

Pilates instructor Julie Driver shares her top exercises to help improve your position in the saddle
A secure seat is the foundation of good riding, regardless of which discipline you do. It’s where the majority of the communication with your horse comes from, and being secure in the saddle means you’re able to use your leg and rein aids independently. Sitting quietly and correctly means there’s less wiggling around and weight shifting, which can confuse your horse and leave him unsure of what’s an aid and what’s you gripping for balance. It can also mean the difference between staying on board and hitting the deck if things don’t go to plan.
Transferable skills
Improving your horse’s strength and suppleness is a key part of your school sessions, but it’s important to apply the same principles to yourself so you can communicate with him effectively. Practising Pilates regularly helps you develop the body control required to keep you balanced and stable in the saddle, and allow the freedom of movement you need while riding.
Many riders are guilty of sitting unevenly, slumping, slouching, or tipping backwards or forwards in the saddle. Correct body alignment is a key part of Pilates and once you’ve learnt what it feels like, it’s simple to transfer into the saddle. It becomes easier to self-correct, too, and build stamina within your muscles so you’re less likely to collapse or arch your back. A correct posture will also improve your seat and build a deeper partnership with your horse.
What is Pilates?
In 1940, German-born Joseph Hubertus Pilates published Return to Life, which contained 34 matwork exercises designed to be performed seamlessly, with one exercise flowing directly into the next. The core principles of these are…
- centring Pilates exercises start from your core and strengthening this area can help you isolate different parts of your body while remaining stable. It has similar benefits to working your horse in a correct outline
- concentration Absolute focus is required to master the movements, helping you relax your mind and develop body awareness. You’ll be able to reap the rewards of training your mind in this way when it comes to remembering a dressage test or course of fences
- control Rather than intensity or repetition, being able to control your body’s movement is key to doing Pilates correctly and also eliminating flappy legs or wobbly hands when you’re in the saddle
- breathing Rather than being something you do automatically, breathing correctly is a key part of all Pilates exercises
- flow Being able to move between each exercise smoothly is an important part of Pilates, in the same way that you’d expect your horse to be able to progress seamlessly through the movements of a dressage test
- precision Using your body properly and in correct alignment is fundamental to reducing the risk of injury, and it will enable you to carry out the other principles. It’ll also help improve your communication with your horse and develop feel
Breathing
You probably already know the importance of breathing in your riding, but how much thought do you actually give to this vital body function? Taking several deep, slow breaths can help focus your mind before you go into the competition ring or relieve any tension in your body that might be blocking your horse’s movement. The way you breathe also transmits to him how you’re feeling – rapid, shallow breathing tells him you’re nervous or unsure.
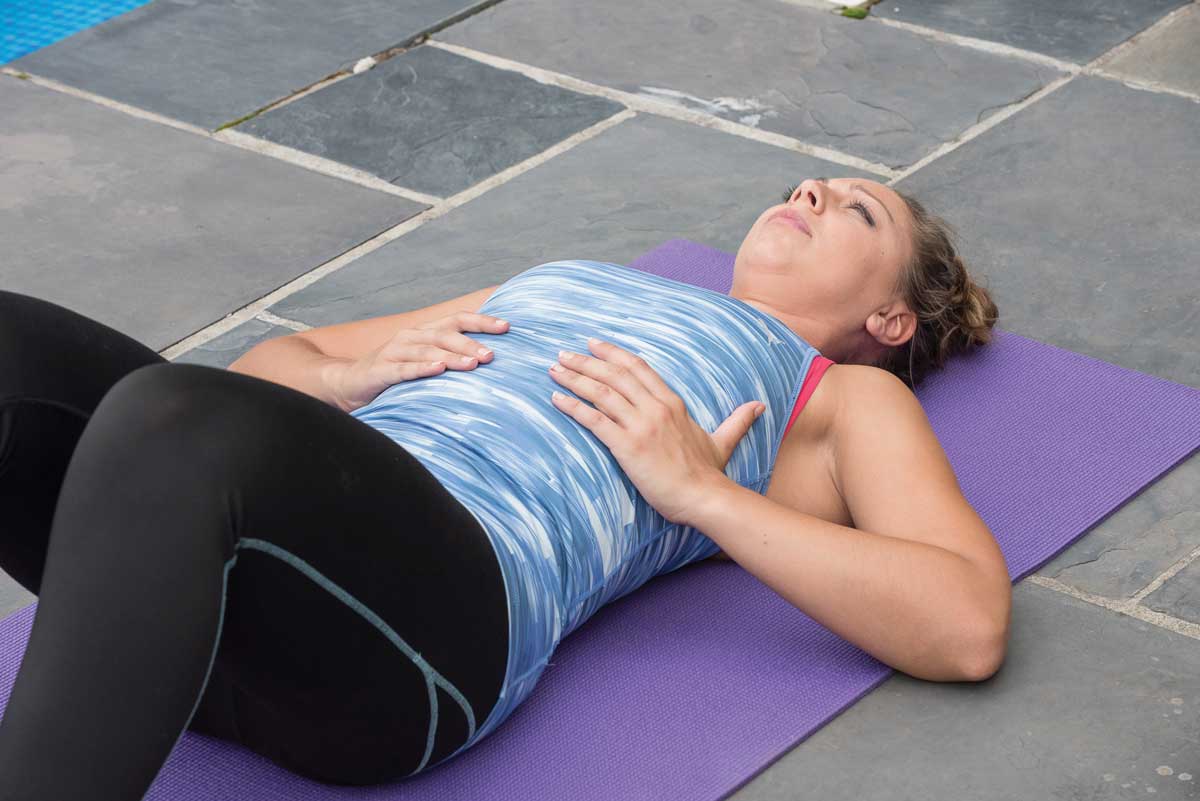
In Pilates, breathing is a vital part of controlling your movements and centring your mind. However, it’s important that you’re able to do it properly in order to get the maximum benefit…
- Place your hands around the base of your ribcage, and feel your ribs expand and lift as you breathe in, drawing the air into the backs, sides and bottoms of each rib.
- When you breathe out, focus on expelling the air and feel your lower ribs drop and move together.
- With the next breath there will be a natural intake of air that expands the bottom of your lungs.
Finding neutral
When your body is in correct alignment, this is known as neutral and it primarily comes from your pelvis and spine. A neutral pelvis acts as a bridge between your thigh bones and spine, helping to create the mix of stability and mobility needed when you’re riding. The better you become at aligning your spine and pelvis, the better you can organise and co-ordinate your limbs. This will help you to improve your aids and make you a better partner for your horse. Finding neutral is the starting point in all Pilates exercises, similar to starting a car in neutral gear.
Finding neutral pelvis
You’re trying to line up what are known as the bony points of your lower body. Think of your belly button as north, your pubic bone as south and your hip bones as east and west. When you’re lying down, your hip bones and your pubic bone should be level with each other horizontally – imagine you’re trying to balance a glass of water on the space between them. Any tilting in your lower body will cause the glass to tip over.
If your body is vertical, such as sitting or standing, the bones of your hips are level with each other horizontally and with your pubic bone vertically. The relevance of this position to your seat is clear – if your hips come in front of your pubic bone, your back will arch. However, if your pubic bone curls underneath your body and comes in front of your hip bones, your back will round.
Finding neutral spine
Once you’ve found a neutral pelvis, you can work towards developing a neutral spine. When the bones of your spine are stacked correctly, the weight of your head and ribs are distributed evenly down through your spinal column.
To do this, stand with your feet shoulder-width apart and your knees soft, then find a neutral pelvis. Imagine a rod going through the top of your head, lining up your ears, shoulders, hips, knees and ankles – this is similar to the correct posture when you’re in the saddle, except your legs are straight rather than bent.
TOP TIP
Your spine is naturally curved like the letter S, which provides its shock-absorbing ability.
Knee folds
Who’s it for?
If you need help improving your balance and establishing a secure, independent seat in the saddle.
What are the benefits?
Because your body and other leg remain still, it challenges your balance and helps to even out any one-sidedness you’re experiencing in your riding.
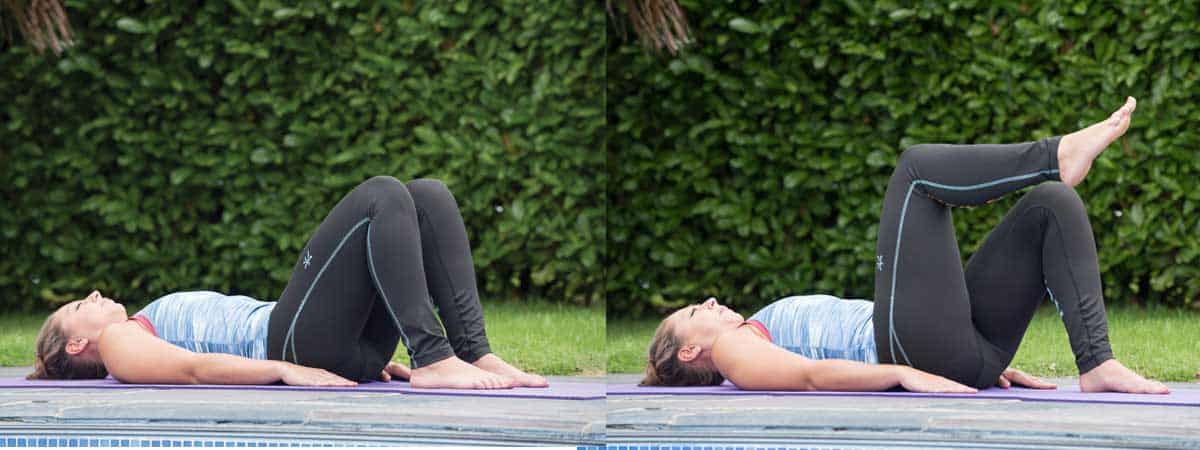
How to do it…
- Lie on your back and place your feet flat on the floor. Find neutral, breathing in through your nose to prepare.
- As you breathe out, lift your left leg into the air, bending your knee towards your hip bone. Keep the movements small at first while your muscles strengthen – your priority is to maintain
your pelvic alignment. - Hold the position as you breathe in, then breathe out and slowly lower your leg back to the floor.
- Repeat the exercise six times, alternating which leg you raise each time.
TOP TIP
If you find your pelvis tips to one side, imagine the opposite hip is heavier.
Spine curls
Who’s it for?
As well as solving the same problems as knee folds, this exercise is also great for relieving tension and stiffness in the saddle, and opening the front of your hip.
What are the benefits?
This exercise improves your spinal mobility and hip extension, while also strengthening the backs of your legs and your buttocks.
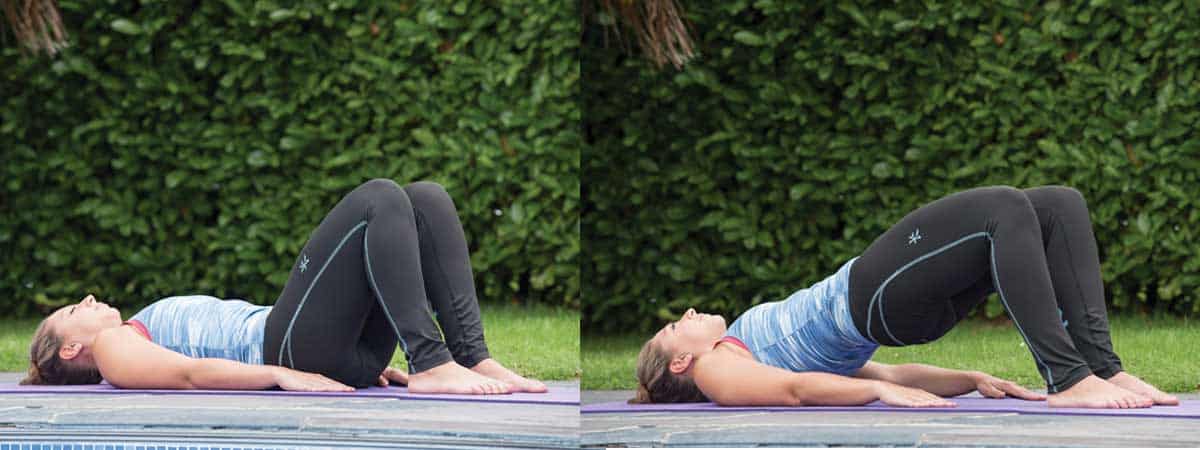
How to do it…
- Start in the same position as you did for the knee folds, breathing in to prepare.
- As you breathe out, begin to peel your spine away from the mat one vertebrae at a time, starting at the base until you reach the bottom of your shoulder blades.
- Keep your spine lifted and still as you breathe in.
- Begin to roll your spine
back down to the mat on your outward breath, starting at your shoulder blades and working down to your pelvis, all the time thinking of drawing one vertebrae away from the next. - Repeat five to 10 times.
TOP TIP
Imagine your spine is like a necklace and you’re trying to move all the links individually.
Hip rolls
Who’s it for?
If you suffer from stiffness and an unstable upper body.
What are the benefits?
This exercise helps to keep your lower back supple by encouraging it to rotate left and right. It also helps to release tension in your upper body.
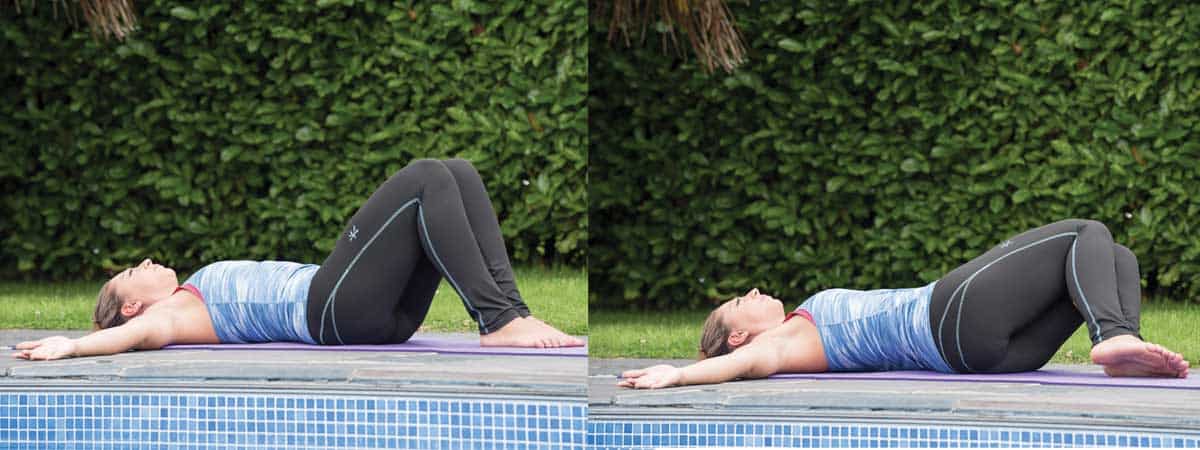
How to do it…
- Start in the same position as the previous two exercises, but with your arms out to the side for greater release across your upper body. Breathe in to prepare.
- As you breathe out, begin to turn your pelvis to one side. Try to turn each vertebrae individually, keeping the opposite shoulder blade on the mat.
- Stay rotated as you breathe in, drawing the air in deeply through your nose to help open your ribs.
- Return to the start position as you breathe out, unwinding your spine from your ribcage downwards.
- Repeat the exercise five or six times on each side.
TOP TIP
Make sure that you’re moving from your spine and aren’t allowing the weight of your legs to pull your body over.
Swan dive prep
Who’s it for?
If you have a tendency to slump or lean forwards. It’s also great if you spend time hunched over a computer or smartphone.
What are the benefits?
This exercise aims to mobilise and strengthen your upper back, building stamina into the muscles that hold your upper spine and ribs vertical.
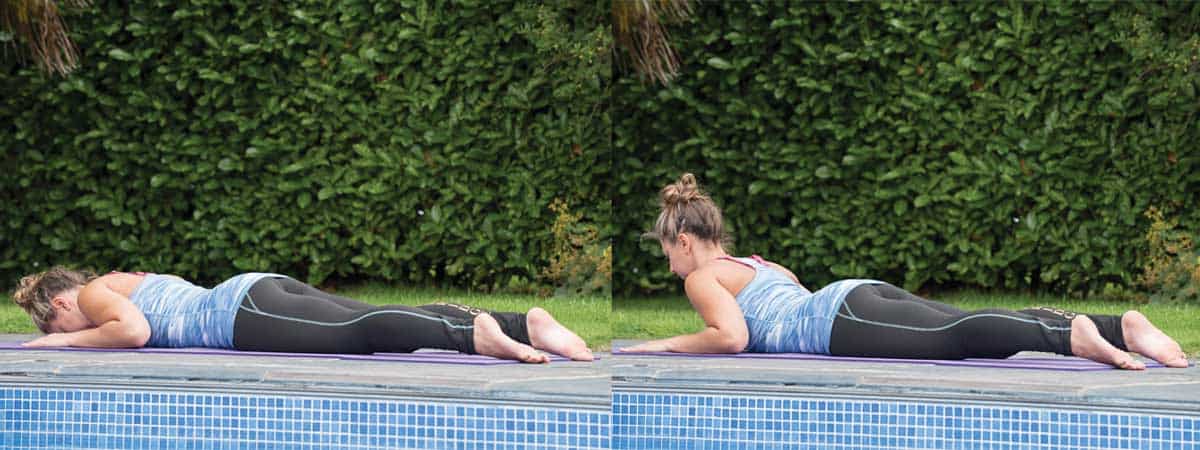
How to do it…
- Lie on your front with your forehead resting on the mat and elbows bent against your sides. Your legs should be hip-width apart and resting on the mat. Breathe in to prepare.
- As you breathe out, raise your head and chest away from the mat, lifting your spine vertebrae by vertebrae until just your lower ribs are still in contact with the floor.
- Use the action of breathing in to try to lengthen your spine.
- Breathe out and lower your spine back to the mat.
- Repeat the exercise 10 times.
TOP TIP
Think of drawing the top of your head away from your feet to encourage more movement through the bones of your upper spine.
Prone leg lifts
Who’s it for?
If you’re unbalanced in the saddle or tight through your hips.
What are the benefits?
This exercise encourages the muscles that run down the back of your leg to lengthen the muscles in front of your hip. Lifting one leg at a time challenges your body to remain still and balanced.
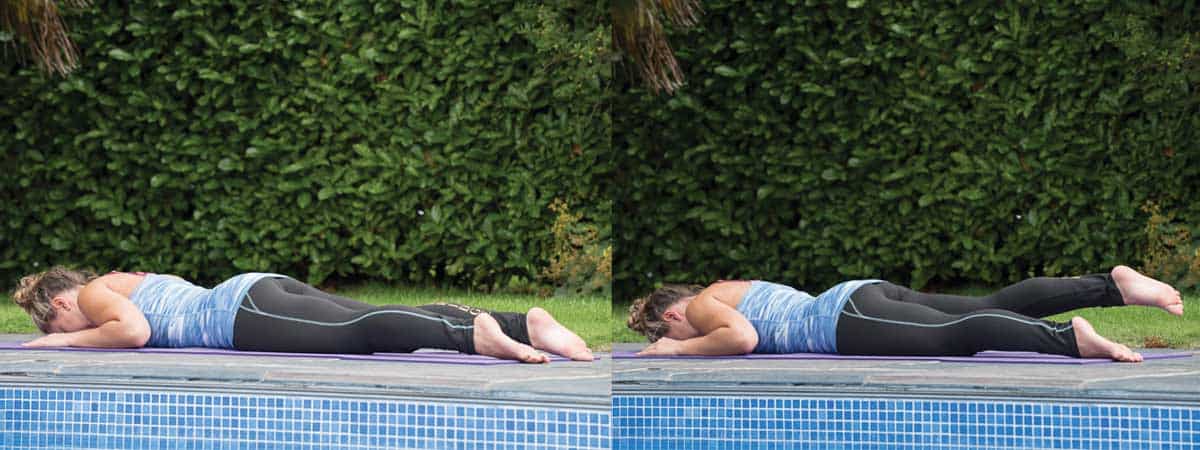
How to do it…
- Start in the same position as the swan dive prep, with your abdominal muscles engaged to protect your back. Breathe in to prepare.
- As you breathe out, think of narrowing your waist and drawing your belly button to your spine. Lift one thigh away from the mat.
- Hold the position as
you breathe in. - Breathe out as you slowly lower your leg back to the mat. Control the movement rather than letting gravity pull your leg down.
- Repeat 8–10 times on each side, alternating legs.
TOP TIP
You may not be able to lift your leg very high at first. Instead, focus on lengthening it and keeping both hip bones on the mat, rather than the height of the lift.
Cat
Who’s it for?
If you struggle to find neutral in the saddle and need to increase your back mobility.
What are the benefits?
This exercise requires you to keep your thigh bones still as you move your pelvis around them. It also helps to build spinal mobility and shoulder stability.
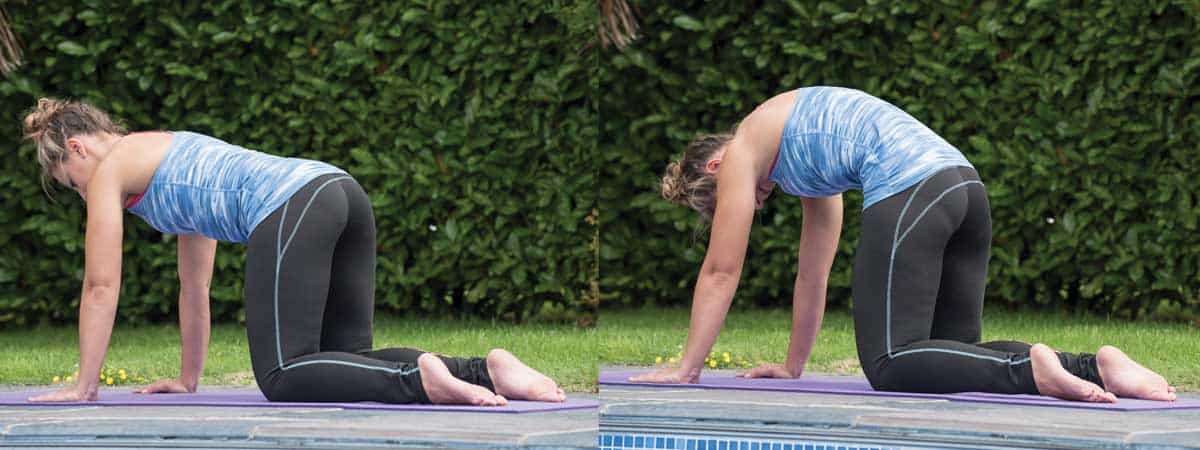
How to do it…
- Kneel on all fours, with your knees beneath your hips and hands under your shoulders. Lengthen your spine, with your head in line with your neck. Breathe in to prepare.
- Breathe out and begin to curl your tailbone down between your legs. Try to move vertebrae by vertebrae, allowing your upper back to gently curve. Nod your head forward so you can see your pubic bone.
- Hold the curve as you breathe in.
- Slowly return your spine to the start position as you breathe out. Again, start from your tailbone, moving vertebrae by vertebrae and focusing on creating a sense of length along your spine.
- Repeat the exercise 10 times.
TOP TIP
Imagine you have headlights on your seat bones and, as you curve your spine, try to shine the lights down towards your heels.
Your Comments

Newsletter Sign-up

Subscribe
Latest Issue
Brilliant Badminton
Added 22nd April, 2024
BRC secures SEIB sponsorship for further two years
Added 5th April, 2024

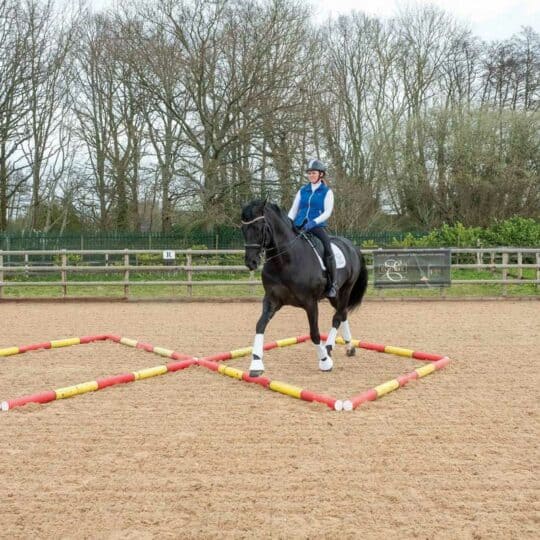
Tania Grantham’s diamond pole layout exercise
Added 27th October, 2022
Dressage to music – prelim level
Added 28th June, 2022