
Featured Professional

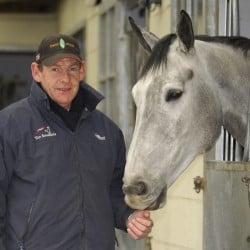
Fizz Marshall
Fizz specialising in exercised-based rehabilitation for horses with musculo-skeletal injuries.
Nervous about trying long-reining? Don’t be! Fizz Marshall explains how to get started
Long-reining can be really beneficial for you and your horse. One of the main reasons people avoid it is a lack of confidence or not knowing how to get started. But with some pre-planning and help, you’ll be working your horse happily from the ground in no time.
Whether your horse is experienced or just starting his ridden career, long-reining can improve his way of going and benefit his training. Don’t see long-reining as a more complex and fiddly alternative to lungeing – although related, the two are quite different and can be used to achieve different goals, or similar ones but in different ways.
The truth is, if you can ride, you can long-rein. At its heart, long-reining is about contact, feel and body positioning and, as a rider, you know about all these things. It’s also a great way to observe your horse from a different angle and can often help you understand what you’re feeling in the saddle by being able to see it from the ground.
Weightless exercise
Long-reining offers a form of riderless exercise for your horse, which can be useful when bringing him back into work or when working a young horse who hasn’t been introduced to a rider’s weight. Any horse in regular work will really benefit from at least one session per week without a rider on their back, allowing the handler to work on specific areas without complicating things by having a person on board. You can work on the same exercises and use the same techniques when long-reining as you would when riding.
On the straight and narrow
One of the benefits of long-reining is that you can teach your horse to do things while still being there to hold his hand. Straightness, or a lack of it, is a fundamental aspect of every horse’s training and often very hard to achieve. However, by teaching your horse to be straight without you on board to correct him, you can make your job as a rider a lot easier.
The capacity to work your horse in a straight line is one of the greatest benefits of long-reining over lungeing. You can choose to work on straightness in the arena or change the backdrop a little and take your horse off around tracks or fields.
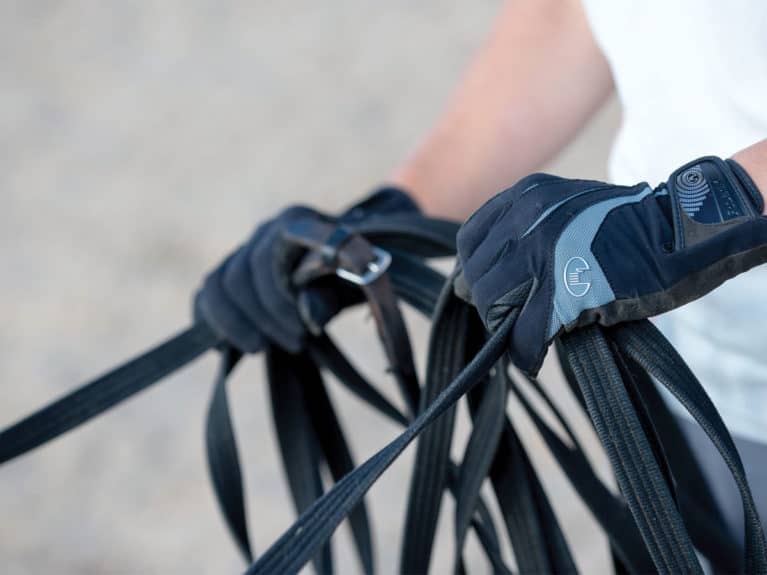
Essential kit
- Snaffle bridle with reins removed – this gives more space on the bit rings to attach side reins and long-reins
- Saddle – if you’re long-reining a young horse, using a saddle can help get him used to tack. The next step is to let the stirrups down, tie them to the girth and run the long-reins through them, which helps familiarise him with another sensation before a rider sits on him.
- Roller with rings big enough for the long-rein clips to fit through and a pad underneath.
- Pair of long-reins – these are a webbing line with a length of cord at each end to help the reins to pass freely through the roller rings to the bit.
Top tip – If you don’t have long-reins, you can use two padded lunge lines tied together at the end. Tying them is important because it gives you more freedom of line length when changing the rein and is also a safety feature in case you drop one line.
Getting started
It’s important to begin your first long-reining sessions slowly and work on the assumption that your horse hasn’t been long-reined before. Go through the process below and ensure you have a helper on hand at all times in the early days…
- ask your helper to stand at your horse’s head with a leadrope clipped to the bit ring. This will give him confidence as you test his response to the feel of the long-reins
- to get him used to the feel of the lines against his shoulders, ribs and quarters, fold them up and gently flip them along the length of his body, up over his back and along the top of his bottom. Watch him carefully and talk to him in a calm voice to reassure him. If he’s worried or reacts negatively, keep going in a calm, confident way until he relaxes
- once he’s happy with the folded lines, clip them on one at a time, passing the right line over his back to clip to the right bit ring, then once both sides are attached, quietly slip it over his quarters as you move behind him into position
Top tip – Your helper should stay beside your horse’s head throughout to provide him with reassurance and keep him standing still while you work through the familiarisation process.
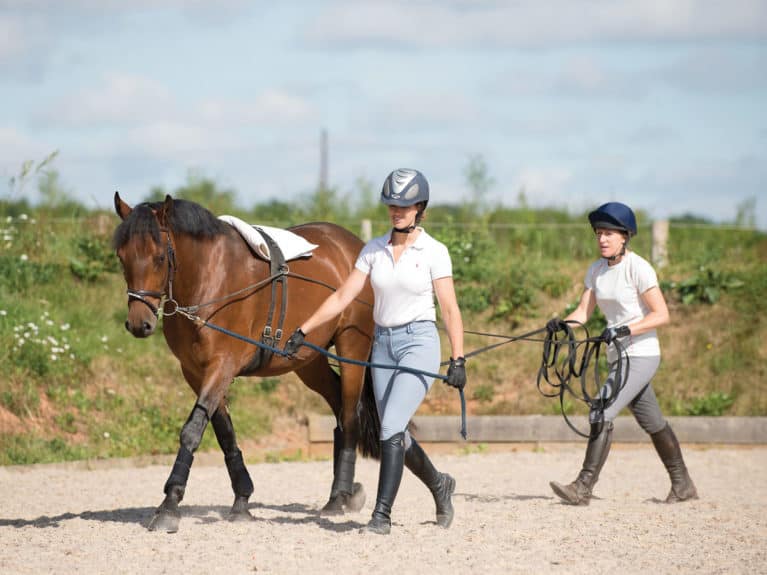
Perfect positioning
The golden is rule is to be as close as possible to your horse without being within kicking distance. The further you are away you are from his mouth, the more drag there is on the line, which affects the quality of your contact. The aim is for your horse to feel the contact from your hands, not from the weight of the line.
Until you’re both feeling confident, ask your helper to walk at your horse’s head to reassure him and also reinforce the aids you’re providing, if necessary.
Once you can request, and achieve, halts, turns and changes of rein with your horse remaining relaxed, it’s time to ask your helper to stand to one side and proceed on your own – at which point you can really get to work.
TOP TIPS
- Hold the lines as you would reins when you’re riding – from your horse’s mouth to your hand, between your little finger and ring finger and up across your palm with thumbs on top. This allows you to keep your contact subtle and elastic.
- Keep your elbows bent and forearms relaxed.
- Hold the lines in small loops to prevent you from tripping over them.
How to: change direction
Once you’re happily moving around the school, start to build in changes of rein. This can feel confusing initially, but think of using your inside line as you would your inside leg if you were riding. Pressure with your inside leg asks your horse to bend around your aid and you can use the rein in the same way.
To change direction, move slightly to your horse’s outside, allowing the inside line to make contact with his flank and hindquarter, which asks him to step underneath with his inside hindleg to make the turn. It’s the pressure of the line along his body that asks him to turn, not pulling on the line. While your inside rein controls the bend, your outside rein is responsible for maintaining straightness and speed through the turn. As your horse comes across to change the rein, drop back directly behind him, then move to the outside as you switch reins in order to turn again.
Achieving your goal
The enemy of successful long-reining is a lack of impulsion. Just as when you’re riding, you can’t generate an elastic contact if you have no power coming from the engine. By standing behind your horse you’re aiming to drive him forwards, so it’s important to ensure you’re generating enough energy. This will make steering easier and help keep your horse in the desired frame. The feeling you’re aiming for is one where he takes the contact up and forwards, driving with his hindquarters and leaving you to steer and maintain a light contact while marching along behind.
Forward-going? Don’t confuse having a contact with hanging on for dear life – as the handler, it’s your job to keep up. By allowing your horse to pull you, or not walking fast enough to keep up with him, you’re creating the equivalent of teaching him to lean on you when you ride. This is as undesirable on the long-reins as it is under saddle.
Problem solved: Make lots of transitions from walk to halt, using your voice to get your horse’s attention and taking the emphasis away from the contact. Frequent changes of rein and being imaginative with school shapes will also help a stronger horse to soften in the contact.
Hollow? Horses who tend to be above the bit are fussy in the contact or drop behind it.
Problem solved: Fit a pair of loose side reins to give him something stable to work into in combination with the long-reins.
Lazy? It’s important to motivate him because without power, you won’t achieve any type of connection.
Problem solved: Using your voice, followed up with little flicks of the long-reins along his side, is the first level of encouragement to ask a lazy horse to go forwards. If this doesn’t elicit a suitable response then carrying a lunge whip will help to reinforce your aid. Lots of transitions up and down through the gears will help to sharpen your horse up, but remember to be quick to praise him with your voice when he reacts quickly. Be ready to go forward with him when he responds – catching him in the mouth won’t encourage him to react positively, so jog a few steps if needed, rather than getting left behind.
Stiff? Use suppling exercises to help mobilise him without the weight of a rider.
Problem solved: Get creative with the school shapes you make. Work on six- or eight-loop serpentines and half-circle changes of rein, really exaggerating the bend as you go. Start in walk to ensure you can maintain control and minimise the opportunity for evasion, but ensure you keep up the impulsion to get the best result.
Another useful exercise is to work from a large circle, gradually decreasing to around 10m diameter, then dropping slightly to your horse’s outside and asking him to move back out to a bigger circle in a subtle leg-yield.
Top tip – Don’t fall into the trap of nagging a lazy horse. Only use aids when you need to, as overuse will only deaden him to them and you’ll stay in the same, laborious cycle of you working harder than him. A lazy horse is a great example of one who can benefit from getting out and about on the long-reins. Warming up a more laid-back horse by going out for a walk around yard tracks or fields before getting to work in the school will help to pique his interest before you get down to business.
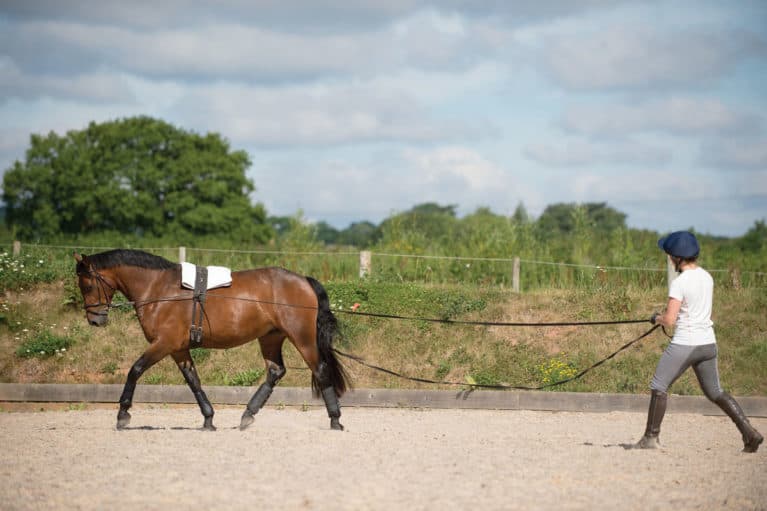
Working on a circle
Once your horse is happy being long-reined in a straight line with you in the driving position behind him, you can progress to long-reining on a circle. This allows you to work him consistently in trot and, eventually, canter. You’re effectively lungeing with two lines while doing this, but with the added benefit of being able to maintain a rein contact, which isn’t possible with one-line lungeing. The physical effect of the outside line running along your horse’s body will help to support him, which is a real advantage for horses who are prone to falling out. This allows you to keep him straighter on the circle, improving the engagement of his hindquarters.
Where to stand: Walk to a point where you’re parallel to your horse and looking at his girth, then bring him onto a circle around you. It’s important that you move to this point gradually, giving your horse time to accustom himself the feeling of the outside line running behind his hindlegs. Keep the line loose throughout to prevent your horse reacting adversely to it.
Don’t stand still – instead, walk a small circle to prevent the circle your horse is on from becoming too small, and focus on maintaining the same light, even contact you’d established when you were behind him. This all takes a bit of practice, but is a very beneficial way of working your horse when you master it.
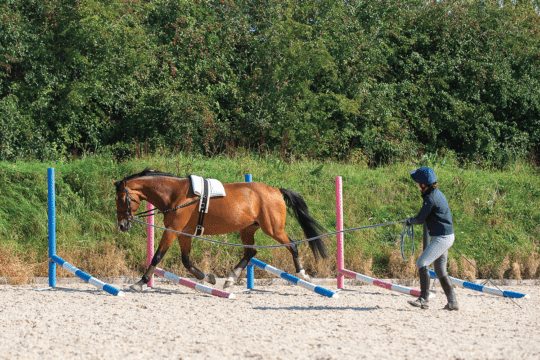
Out and about
Venturing out of the school is particularly useful for young or spooky horses because it teaches them to face things for themselves, but with you there to help build confidence.
To do this safely and make it a positive experience for both of you, take a helper at least the first time you go out. This will help give both of you confidence and quickly resolve any worries. Start off with the helper walking alongside your horse’s head with him clipped to a leadrope. It’s important the helper stays at his shoulder so your horse is always the one going first. When you’re happy that he’s confident and focused, unclip the rope with your helper alongside. They can then walk beside you as your horse carries on in front. If he become nervous or ignores your aids, the helper can quietly and quickly get back to his head so you can carry on with minimum fuss. He’ll soon get the idea!
Top tip – Start each session in the arena to ensure the brakes and steering are in place before heading off piste.

Finishing up
Finish off the session by allowing your horse to walk on a longer rein and stretch, then move back behind him to come to a halt. Quietly bring the right line up over the top of his back as you walk up his left side and back to his head. Once at his head and in control, unclip the lines one by one and detach them from the roller.
Another great non-ridden exercise for your horse is lungeing, find out how to lunge here.
Your Comments
3 thoughts on “Good groundwork with long-reining”
Leave a Reply
You must be logged in to post a comment.
Newsletter Sign-up

Brilliant , I can’t wait to get started. Clear and very informative lessons here thank you very much.
Absolutely brilliant!! Very well explained . Looking forward to putting into practise
Excellent advice! Cannot wait to get started with my 3 yr old x