

Shine in the competition arena this summer with Fizz Marshall’s guide to creating eye-catching quarter marks
The perfect finishing touch to your horse’s turnout, quarter marks will help you catch the judge’s eye for all the right reasons. They’ll transform the look of your horse and can enhance his conformation, too.
Although they’re usually seen in the show ring, quarter marks are popular in dressage and eventing, too, and range from simple, straightforward lines to detailed designs. If you’re after something intricate you’ll probably need to use a stencil, but achieving eye-catching quarter marks freehand isn’t as tricky as you might think. All you need to do is break the process down into stages and put in a bit of practice to perfect them.
What you’ll need
- clean body brush that has closely populated bristles
- small metal mane comb
- towel
- water or fixing spray
- something safe to stand on so you can see the top of your horse’s quarters
Choosing the right quarter marks for your horse
As well as highlighting good conformation, quarter marks can be used to create the illusion of well-muscled hindquarters. For example, if your horse lacks muscle tone, a half moon mark will improve the definition of his hamstrings.
Remember, though, that all horses are different and not every quarter mark will be right for yours. For example, if he’s long in the back, he may look even more so if you put vertical stripes on his quarters. The best thing to do is try out different designs, then stand back and look at them carefully to work out if they suit him.
Getting started
To give you the best chance of creating stunning quarter marks, groom your horse, then wipe a soft towel over his quarters to remove any remaining dust. Make sure you brush and polish the hair in one direction.
Slightly wet your brush in a bucket of clean water and give it a good shake, then run it over the towel to remove any excess water. If your brush is too wet, the hair will set as it dries and it’ll lose its shine. You’ll probably need to dampen your brush after every two or three sweeps across his coat.
If you’re using a fixing spray rather than water, spray this where you’ll be creating your design.
Top tip
If you’re at a show on a cold day, apply your horse’s quarter marks as close to your class as possible to avoid putting a rug over them, which could rub away all your hard work.
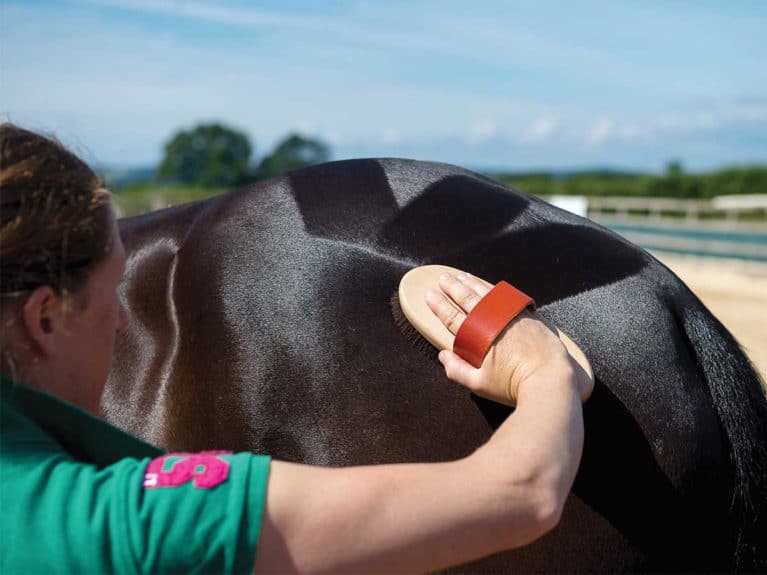
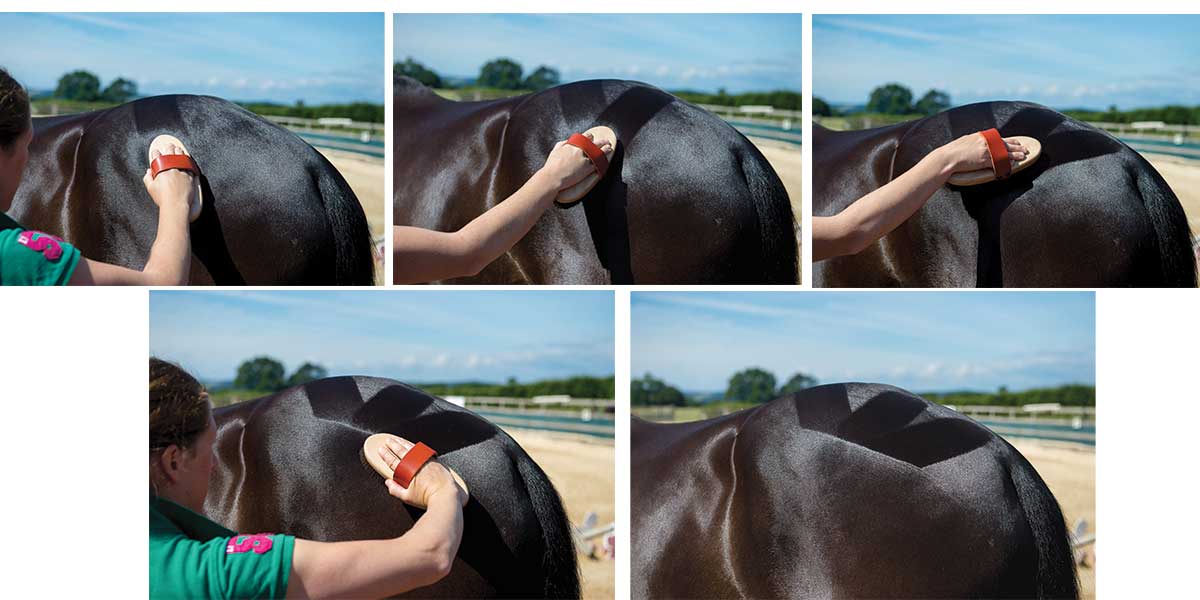
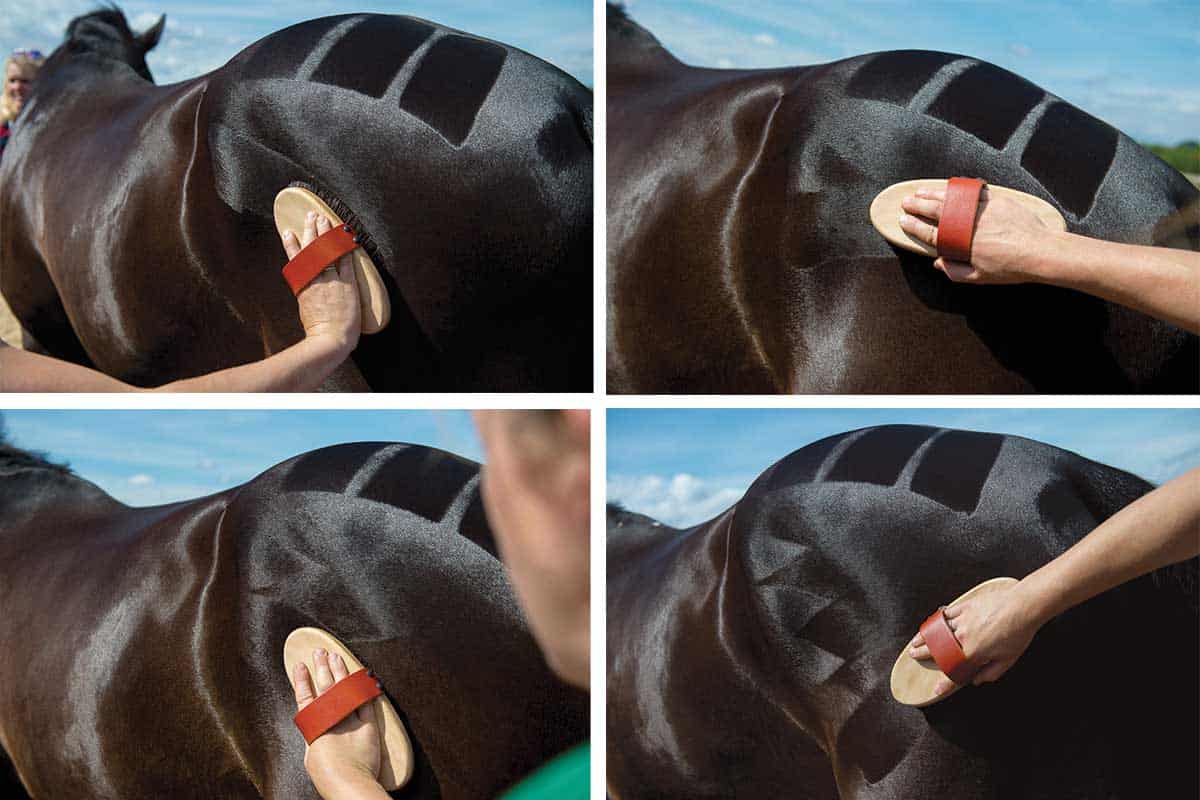
Stripes
A simple yet effective design to try is vertical lines. These particularly suit horses who have well-muscled quarters. You can create two or three lines depending on the size of your horse.
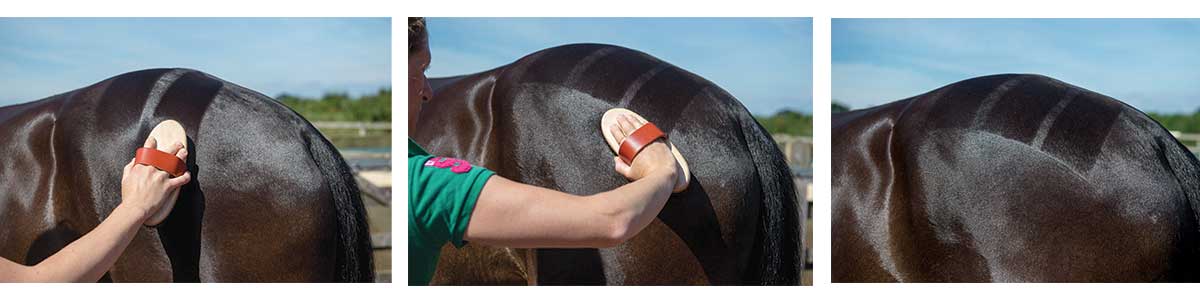
Step 1 To create the first stripe, run your brush downwards in a straight line from the point of your horse’s croup until you’re level with the point of his hip. Exert firm, even pressure on the brush and keep it moving in a continuous sweep. Make your lines a little longer than you want the overall finished shape to be.
Step 2 Repeat this process for stripes two and three. Don’t forget to use the same amount of pressure, as this’ll help you achieve stripes that are all the same width.
Top tip
To ensure your lines are evenly spaced, mark out where you want them to be before you get started. You can make little dots on your horse’s coat using your brush.
Step 3 Create the same design on the other side of your horse’s quarters – you might need to stand on a step to help you match the stripes up. This is important so your horse looks symmetrical from behind.
Step 4 Once you’ve completed your pattern, sweep your brush along the bottom of the stripes to create a sharp edge. Follow a line that’s roughly level with the point of your horse’s hip. Curving your brush downwards as you reach the end of the line will give you a neat finish.
Top tip
Sharpen up your quarter marks by running your brush along the central line of your horse’s quarters, from the point of his croup to the top of his tail. Take care when standing behind him and use a step, if necessary, to help ensure your brush mark is straight.
Half diamond
A half diamond design can add definition to weaker quarters. You can adjust the size and direction of the diamond to suit your horse by changing the point at which your diagonal lines meet.
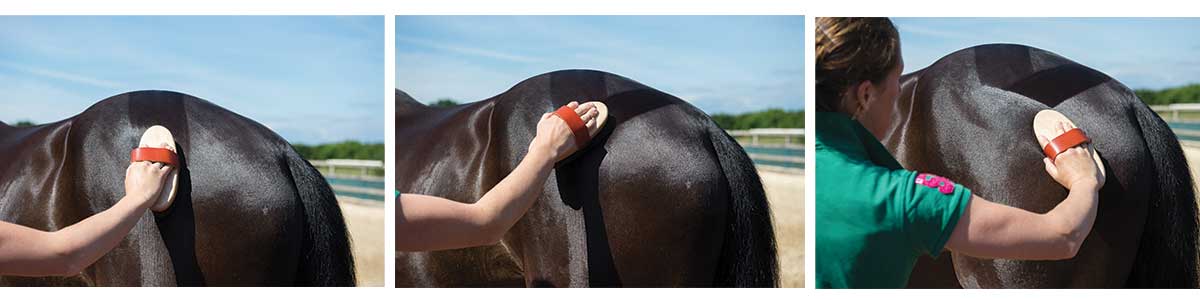
Step 1 Run your brush in a downwards diagonal line from the point of your horse’s croup to the mid-point between his hip and his hamstring. Continue until you’re level with the point of his hip.
Step 2 Create a second line that runs diagonally from about a hand’s width away from his tail to meet the point of your first stripe.
Step 3 Finish the shape by running the brush underneath the base of your diamond, on a slight curve.
Step 4 Repeat the design on the opposite side of his quarters.
Half Union Jack
Show your patriotic side with this versatile quarter mark which was sported by Valegro at the Rio Olympics. Getting the angles of your diagonal lines right is key with this design.
Step 1 Make a mark with your brush where you want your lines to be, as this will help you get the spacing right. Begin your first stripe in the same way as the half diamond pattern, taking it downwards in a diagonal direction.
Step 2 Brush the vertical middle line downwards from the mid-point between your horse’s croup and his tail to meet the first diagonal line.
Step 3 Starting from a point that’s a hand’s width away from his tail, brush a downwards diagonal line to meet your middle line.
Step 4 For the finishing touch to your Union Jack, brush a horizontal line along the bottom of your design.
Step 5 Mirror the pattern on the other side, then brush along his spine to his tail.
Half moon
A crescent shape over your horse’s hamstrings will highlight muscle development and it’s easy to create, too. Use it alongside other designs.
Step 1 Start from the point at which the top of your horse’s tail meets his quarters and brush downwards in a slight curve, towards his leg.
Step 2 Continue your line until the hair changes direction.
Chequerboard
A chequerboard gives a professional finish. You can buy a stencil, but they’re easy to do freehand.
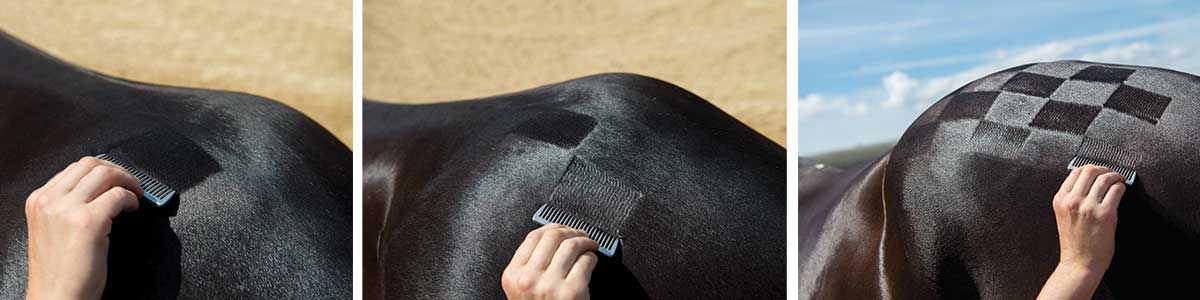
Step 1 Using a small metal mane comb, create your first square below your horse’s croup on the fat part of his gluteal muscle. Keep the comb horizontal and bring it downwards until the square is the width of the comb on all sides.
Top tip
Nit combs are ideal for making a chequerboard. You can buy them from a chemist or ask a friend with children if they’ve got one spare.
Step 2 Leave a space the width of the comb, then create your next square.
Step 3 Start your next row to the right of your first square, and again leave the width of the comb between each one. Do three or four rows, depending on the size of your horse.
Step 4 Repeat on the other side of his quarters, making sure the patterns line up so he looks symmetrical
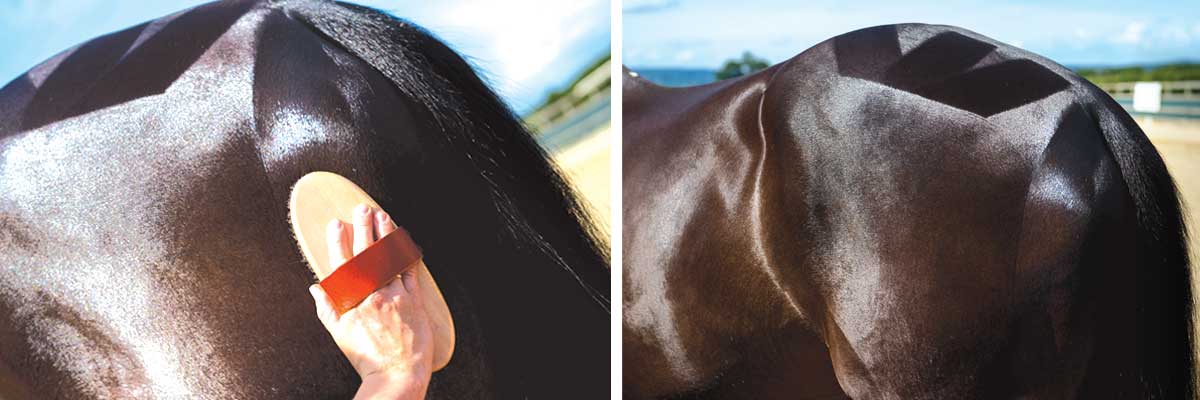
Shark’s teeth
This design highlights the muscle around your horse’s biceps femoris (second thigh), and the size of the teeth can vary depending on the size of your horse. You can use shark’s teeth alongside other designs, such as horizontal stripes.
Step 1 Brush the hair up and back, then make your first line by brushing downwards and diagonally towards your horse’s hindleg. If bigger teeth are required, brush an extra line underneath this one, running parallel to it.
Step 2 From the end point of your first line, brush upwards and diagonally. Again, add another line under this one if bigger shapes are required.
Step 3 Repeat steps 1 and 2 to create your next tooth, aiming to keep the size equal.
Step 4 Continue with your downwards and upwards strokes to create as many shark’s teeth as you wish. Finish your final tooth with an upward stroke and brush the hair below your last triangle upwards to keep the definition of the shape. Don’t forget to repeat the design on his other side.
Practice makes perfect
There are no hard and fast rules when it comes to quarter marks, so practise a few different types and see what looks best on your horse before you go to a show. Changing the size of your lines and shapes will alter the effect, too, so don’t be afraid to experiment and be creative with your markings.
Then, when you’ve found a look that works, you can show off your handiwork in public.
Your Comments
Related Articles

Newsletter Sign-up
