


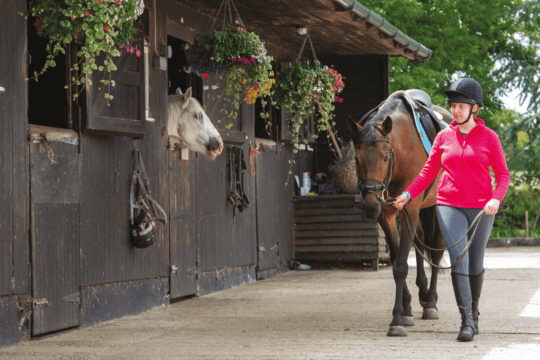
Confused about the hows and whys of studding your horse? Read on for Horse&Rider’s comprehensive guide to screw-in stickability
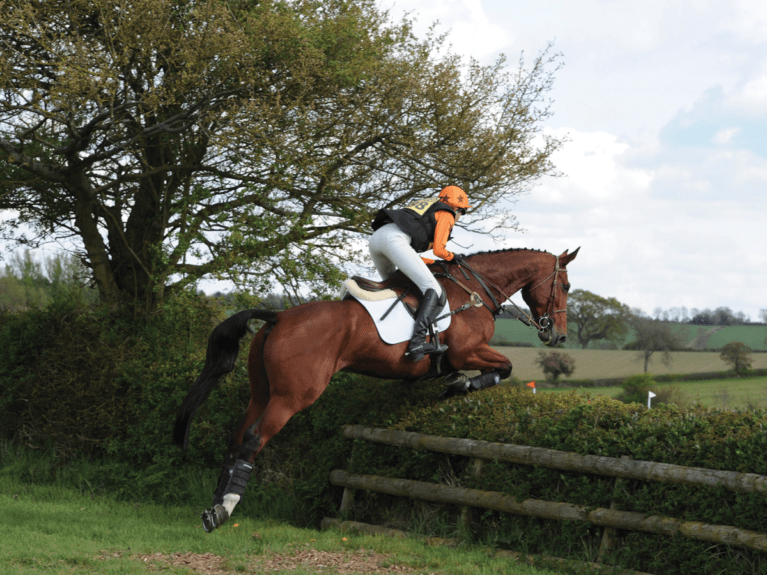
Studs might seem like something you only need if you’re tackling huge cross-country courses, but they can be very useful at the lower levels, too. With so many options available, learning how and when to stud your horse can feel overwhelming, but it needn’t be. By following a few golden rules and kitting yourself out with some essential gear, you can help give your horse some extra grip, no matter what the situation.
TOP TIP
If you want to stud, you’ll need to ask your farrier to drill stud holes into your horse’s shoes. The price of this service varies, but expect to pay around £1 per hole.
Why stud?
Studs are small metal projections that screw into your horse’s shoes. They’re used to give him better grip on various types of footing, from firm and slippery to soft and boggy. They’re great if your horse loses his focus in less-than-ideal footing or to give him extra traction when doing roadwork. However, studding isn’t a one-size-fits-all solution – different shapes and sizes of stud do different jobs, and preferences vary from rider to rider.
TOP TIP
Studding requirements are as individual as your horse. Some horses take confidence from the extra grip, while others are put off by it. Either way, spend time riding your horse on a variety of surfaces without studs so that he can learn to balance himself and you can work out where he needs the extra help.
Anatomy of a stud
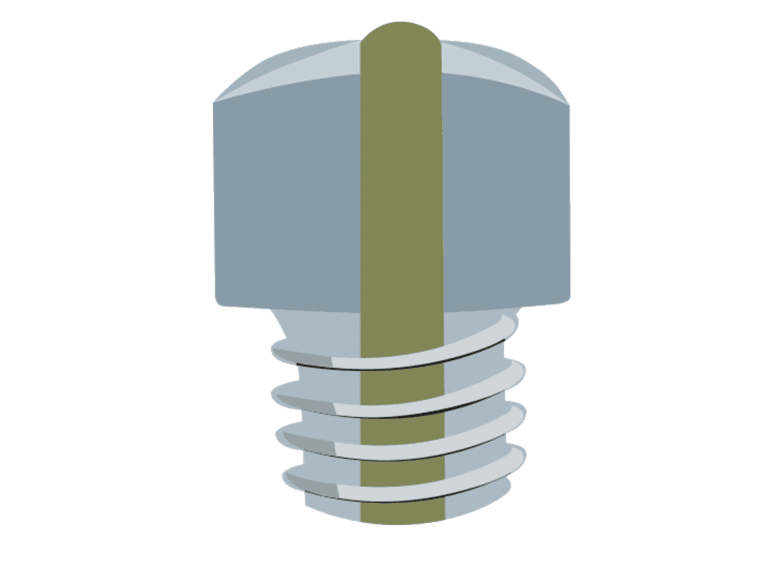
The durable tungsten core is tough enough to withstand abrasive conditions and continuous impact, and provides extra grip in the form of an exposed tip
The barrel of the stud is the external body, and is shaped and sized according to the stud’s purpose
The thread is the part that screws into the stud hole. It’s essential to keep it clean and dry so you don’t compromise the thread or the stud hole
Types of stud
Blank or sleeper studs – these small studs are used to preserve and protect your stud holes, and when only the slightest bit of grip is needed – for example, when doing light work in normal conditions.

Road studs – square or hexagonal in shape, these small studs help your horse gain extra traction when doing normal work on good going. Although they’re called road studs, they’re better used on a surface or on grass. They feature a small dome in the centre, distinguishing them from blank studs.

TOP TIP
If you’re only in need of a bit of extra grip on the road, ask your farrier about tungsten carbide road nails rather than studs. These hardy nails stick out from the shoe by about 1mm and offer a bit of extra help on slippery tarmac.
Bullet studs – the long, rounded dome shape of these studs is best for soft going or deep mud.

Grass studs – the sharper, more pointed tip of these studs is ideal for penetrating hard, unforgiving ground.

TOP TIP
Avoid putting pointed grass studs in the inside hole of your horse’s shoe, as they’re more likely to cause an injury if he brushes or overreaches. Instead, pair them with a bullet stud of the same length.
Hold your horses
Once you’ve got to grips with studs, it can be tempting to turn to them whenever the conditions are less than ideal, but it’s important to be aware of how the extra traction can affect the structures of your horse’s leg so you can make an educated decision. Studs prevent his hoof from skidding, which can mean that the upper structures of his leg continue to move forwards after the hoof has stopped. The effect of this is exacerbated if your horse is over-studded, and can cause increased strain on his tendons and suspensory ligaments. For this reason, less is always more when it comes to selecting the appropriate studs.
TOP TIP
Practise putting in studs at home when you’re not in a rush. It’s also a good idea to introduce your horse to studs before you compete in them – just as you wouldn’t try a new bit for the first time at a competition, you don’t want to change his way of going for the first time in a pressurised situation.
Five steps to studding
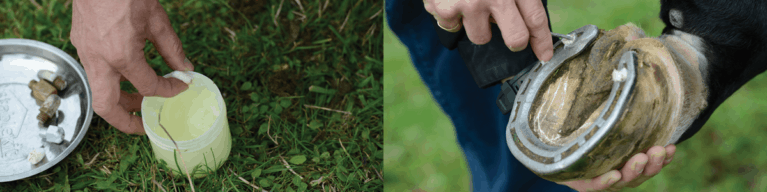
Step one: Using the pointed end of your stud cleaning tool, or a horseshoe nail, remove the plug from the stud hole. If there’s any stubborn dirt in the hole, you can use the small brush on the end of your cleaning tool to remove it by inserting it and turning it with the thread, rather than using a plunging motion.
Step two: Clean the threads of the stud hole using your tee tap. Carefully screw it in perpendicular to the shoe, following the thread. It’s important to use a special tee tap, as the thread has channels that help remove debris.
Step three: Screw in the stud as tightly as you can by hand, then use the spanner to tighten it further. Don’t rush – it’s easy to misalign the stud if you’re in a hurry and damage the thread.

Step four: When you’re ready to unstud your horse, unscrew the stud and immediately replug the stud hole using a specially designed plug, or a wad of cotton wool coated in petroleum jelly or WD-40. Clean the stud with a clean, damp cloth to remove any residual dirt, then dry it thoroughly to avoid rusting. Spray the stud with WD-40 and store it in a compartmentalised case where it won’t get wet.
The golden rules of studding
- Never travel your horse in studs, as they’ll damage the floor of your horsebox or trailer, as well as increase the risk of injury if he steps on himself.
- Remove your horse’s studs as soon as you’re done riding. This minimises the chance of any soreness from prolonged use, much like taking off a pair of high heels. Unstudding promptly also means you’re less likely to have your toes stepped on by a studded horse – ouch!
- Always put protective boots on your horse if he’s wearing studs.
- When in doubt, leave it out. It’s always better to under-stud and ride more cautiously than to over-stud and risk injury.
- Never put studs in just your horse’s front shoes, or smaller ones behind than in front. Studding stops your horse’s legs from moving as quickly, so if he’s wearing bigger studs in front, then he won’t be able to get his forelegs out of the way of his hindlegs, creating an increased risk of overreaching or falling.
- Don’t be afraid to ask your fellow competitors or professionals at neighbouring boxes which studs they’re using.
- Clean stud holes as soon as your horse has been shod, then remove the plugs and give them another clean the day before you’ll need to stud. You don’t want to discover a stone wedged in the hole once you’re at the competition and your horse won’t stand still.
Kitted out
Decided to give studding a go? Once you’ve chosen your studs and organised for your farrier to drill in stud holes, there are a few more essential pieces of kit that you’ll need…
Magnetic tray or wristband: When you’re studding up at a competition, the last thing you want to think about
is keeping tabs on all your studs. A magnetic tray or wristband keeps them contained until you need them, saving
you the hassle of hunting through the grass for a missing stud.
Tee tap: A tee tap is a studding necessity, as it cleans and reinforces the thread in the stud hole, preventing damage to the hole and stud. They come in a variety of styles, from the most basic to a multipurpose tool that includes a spanner in the handle. You can also buy safety taps with flat bottoms, so if your horse stamps his hoof down, he won’t do any damage to his foot.
Cleaning products: With a pointed end for removing plugs and a spooly brush end – like a stiff mascara wand – for getting rid of dirt, a stud cleaning tool is a must-have in your studding arsenal.
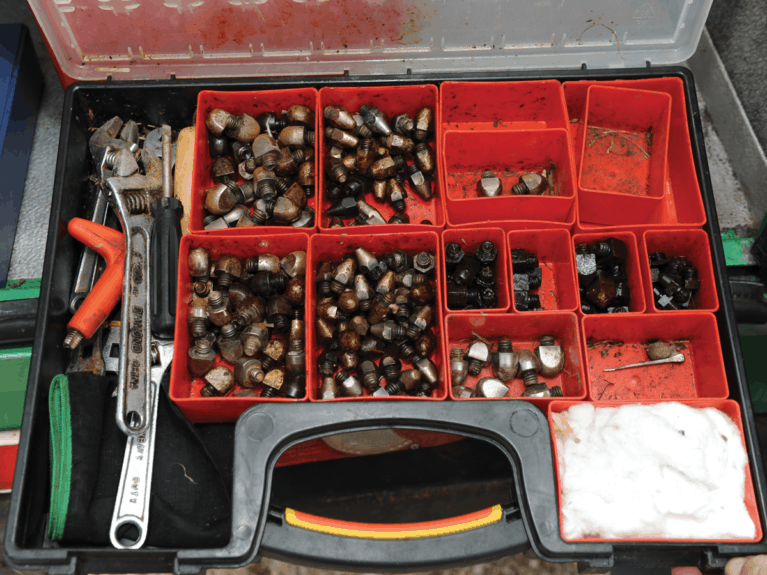
A compartmentalised case: The individual compartments mean you can sort your studs by type, and they also stop them from moving around and being damaged.
Stud plugs: There’s a variety of different options for plugging stud holes, from foam inserts and cotton wool to screw-in metal plugs. The latter option is good if you remember to take them out for a clean once a week, otherwise they’re likely to rust and get stuck in the stud hole.
A stud guard: This protects your horse from nicking his belly with a stud, especially if he’s a very tidy jumper. If you don’t want to commit to the expense of a stud girth, you can opt for a stud guard attachment that slides onto your normal girth.
A spanner: Essential for securing your horse’s studs with no risk of loosening.
Your Comments
Related Articles
Newsletter Sign-up
