
Dressage rider Tania Grantham’s creative layouts will help you get the most out of polework. The best part? You only need six poles to get started
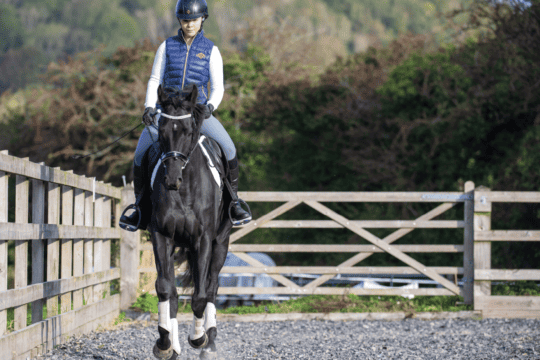
Riding a simple line of poles definitely has its place in training – and the rewards can be reaped whether you’re a regular over fences or between the boards. Whether you have six poles or 26, if you want to work on straightness and accuracy, improve your horse’s strength and paces, teach him something new or just inject a bit of fun and focus back into you flatwork sessions, using your poles to make schooling shapes could be the answer. In this feature, we start with a simple allrounder – the bow tie.
One polework layout for all
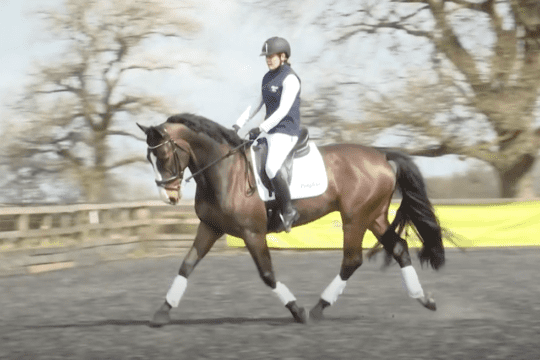
Have you ever set out a line of trot poles and had to get off to adjust them for canter work? Not so with shapes. This layout can be used for all horses, from 11hh ponies to 17hh warmbloods, and they can all work through the layouts in any pace without making a single alteration. You might have to tweak your route through the shapes or ask your horse to collect or extend for the perfect fit but, in doing so, you’re enhancing your horse’s adjustability and improving his responses to your aids – all in all, it’s a win-win.
The bow tie
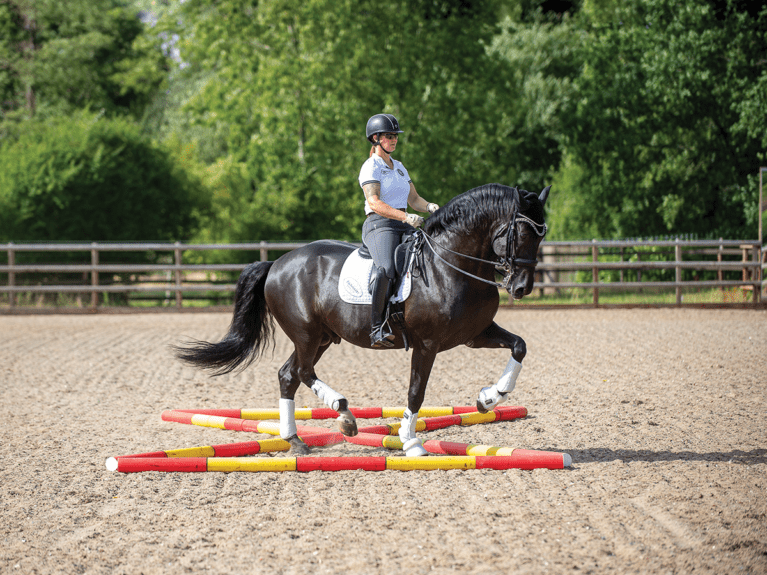
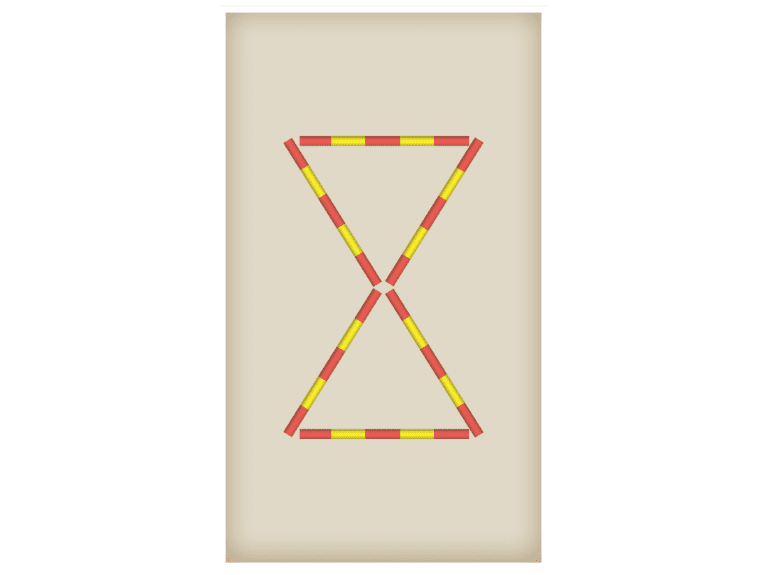
Made up of just six poles, the bow tie layout is perfect for riders with minimal equipment and space. However, it’s also a great formation with many possibilities for anyone at any level.
Set up Make two equilateral triangles with their points touching – the end result will look like a bow tie.
How to use it There are no hard and fast rules for using this layout, but here are some ideas to get you started…
Pole exercises for straightness
Here, the bow tie is used as a focal point for riding centre lines in walk and trot.
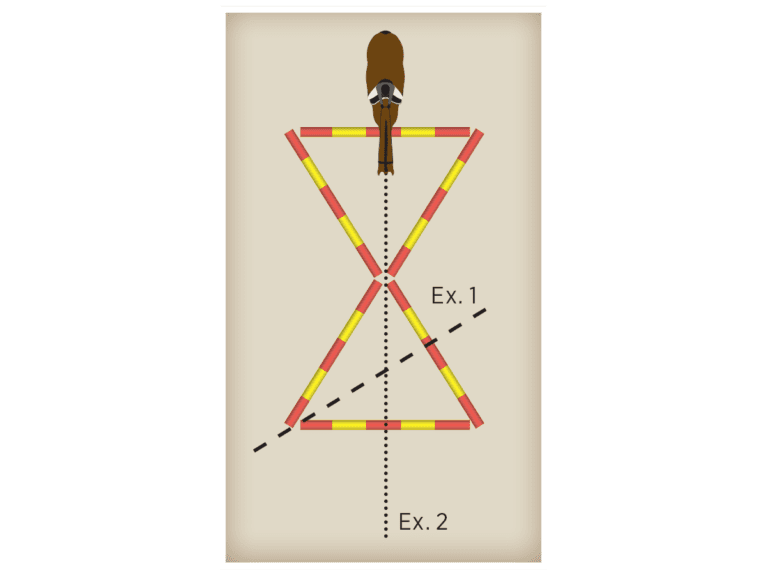
Exercise 1
The key to a perfect centre line is accuracy, so first ride a diagonal line through a triangle. Aim for the middle stripe on one side and ride out through the point opposite. Then, reverse the exercise so you’re riding over the point first. It can take horses a few attempts to get used to travelling through the points, so this simplified exercise will give you both the chance to get used to the layout.
Exercise 2
Ride over the base of the top triangle, through the intersection of points and out of the base of the bottom triangle.
Focus on…
- keeping an even feeling in both reins
- applying your aids equally
- maintaining his rhythm – if he backs off, encourage him with your leg and if he rushes, take a half-halt
Polework exercises for accuracy
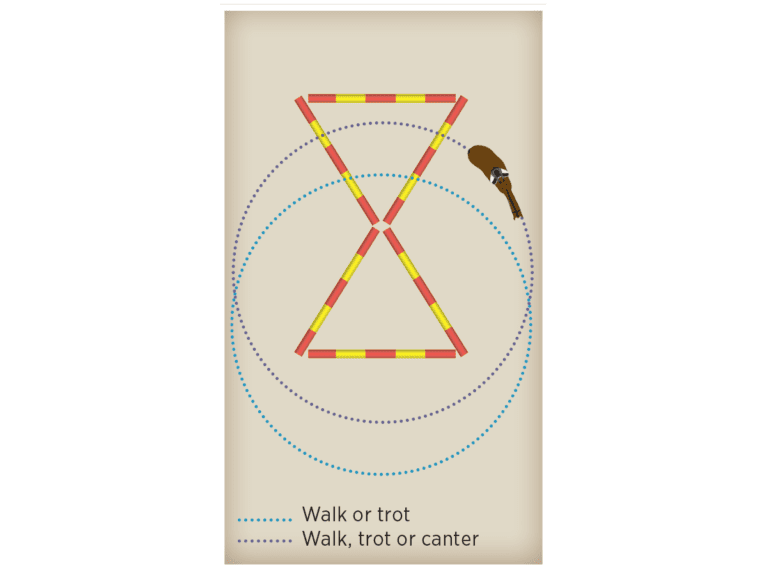
Set up your bow tie so that you can ride 20m circles over both the widest and narrowest parts of at least one end of the shape. Use the stripes on the poles to make your circles more symmetrical and an accurate shape and size.
Focus on…
- your horse’s outside shoulder – don’t let it drift from the path of the circle
- inside bend – you should be able to see his eyelash
- maintaining his rhythm through the pole layout
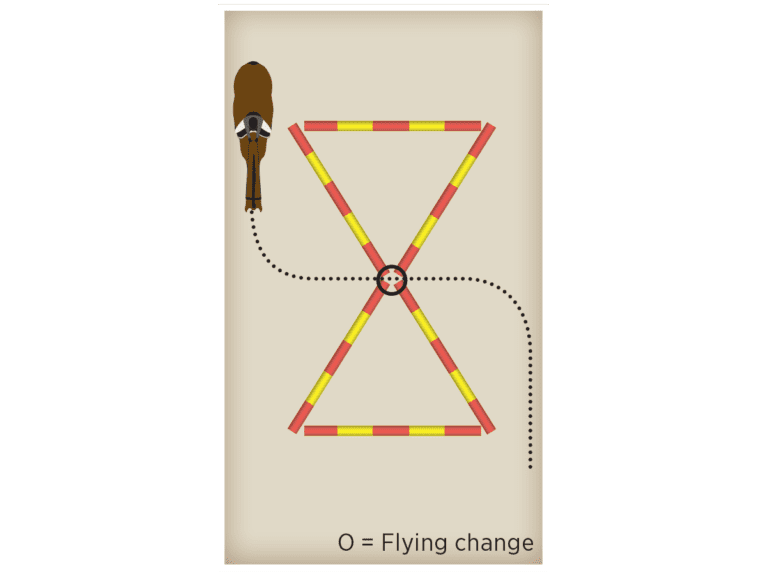
For teaching flying changes
Note: Before attempting flying changes, your horse’s trot-canter transitions must be well-established and reliable. If you’re new to flying changes, ask your instructor to work on them with you first.
Establish a rhythmical working canter large before turning across the school from the track and applying the new canter aid over the intersecting points. The points will encourage more jump within your horse’s canter stride, giving him the power he needs to execute a clear change of lead.
Focus on…
- keeping him settled – he might find this exercise quite exciting, so if things get heated, drop down a gear until he cools off
- applying a clear new canter aid as your horse steps over the poles – don’t just pull your new inside rein
- looking in the direction of the new lead – this will help shift your weight to make it easier for him to change
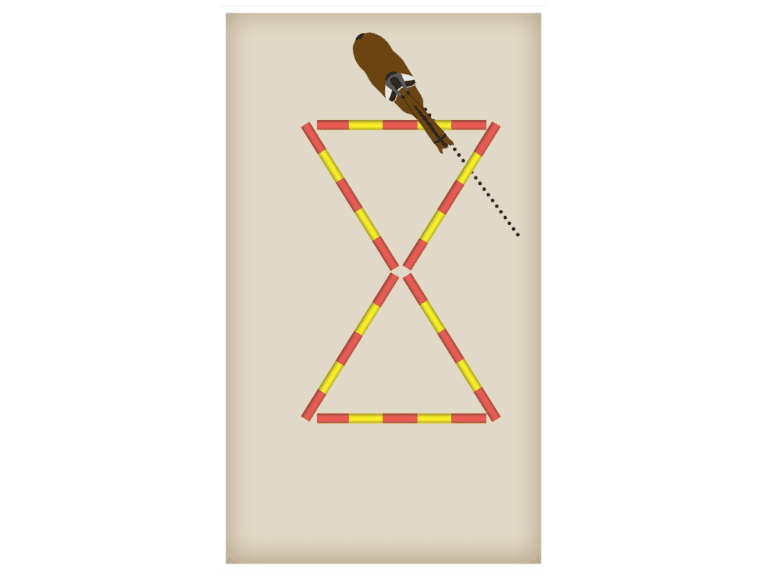
Ridden polework exercises for a test of your control
It doesn’t matter where the bow tie is set up, but this is a great exercise to make your warm-up more interesting or as a break from more strenuous activity. In walk, ride a line through any of the bow tie’s outer points, aiming to have your horse place just one foot per pair in the point.
Focus on…
- collecting his walk to give him more time to analyse the problem and allow you more control over where he puts his feet – sit tall and still the movement of your hips while using your leg aids to maintain his walk’s energy
- giving him clear instructions to boost his confidence
- keeping one step ahead of him – it’ll be quite easy for him to duck out to the side
- being patient – this is likely quite an unusual question for your horse and it might take a few attempts for him to understand what you’re asking. If he’s unsure, ride the line a little closer to the middle first so that all four feet pass through the corner, then move the line closer to the point
Quick to reward
Every schooling session should be enjoyable for both of you so make sure to give your horse plenty of praise when he gets it right to make you both feel good. The poles will get him to use his muscles maximally, so offer him breaks and stretches as and when he needs them. End your session on a rewarding note, too. For example, my horses like to have a ‘victory gallop’, a canter in a light seat, at the end of a session to let off that last bit of steam and release any tightness from a productive workout.
Your Comments
Related Articles

Newsletter Sign-up

Subscribe
Latest Issue
Brilliant Badminton
Added 22nd April, 2024
BRC secures SEIB sponsorship for further two years
Added 5th April, 2024