
Stuck for ideas when schooling on winter evenings? Horse&Rider comes to the rescue with four fun, quick exercises from top trainers to improve your horse’s way of going and your riding, too
Staying focused and motivated during the long, dark winter evenings can be really difficult. Everything seems more bleak when it’s cold and gloomy, and schooling can feel monotonous.
If you’re stuck in a rut with your schooling and getting nowhere fast, then help is at hand. We spoke to top trainers and riders to bring you a new exercise to try each week, all winter. Spice up your schooling, teach yourself and your horse something new and improve his way of going ready for the spring competition season.
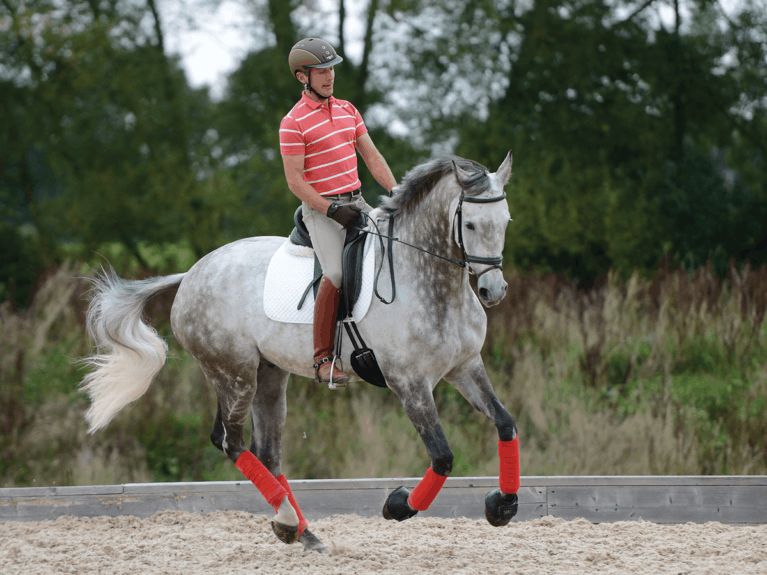
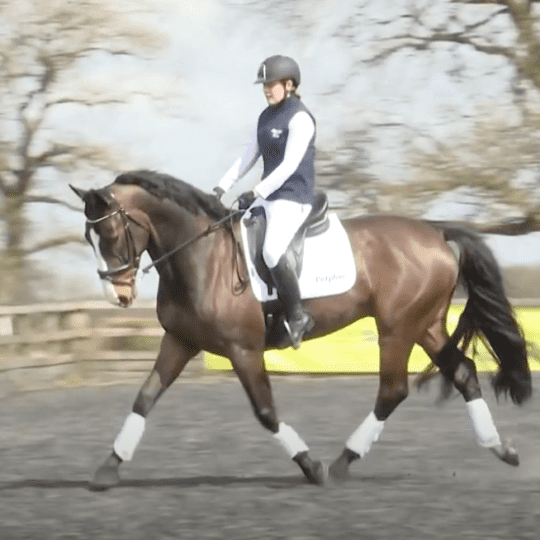
Dan Greenwood – 5 minutes – canter transitions
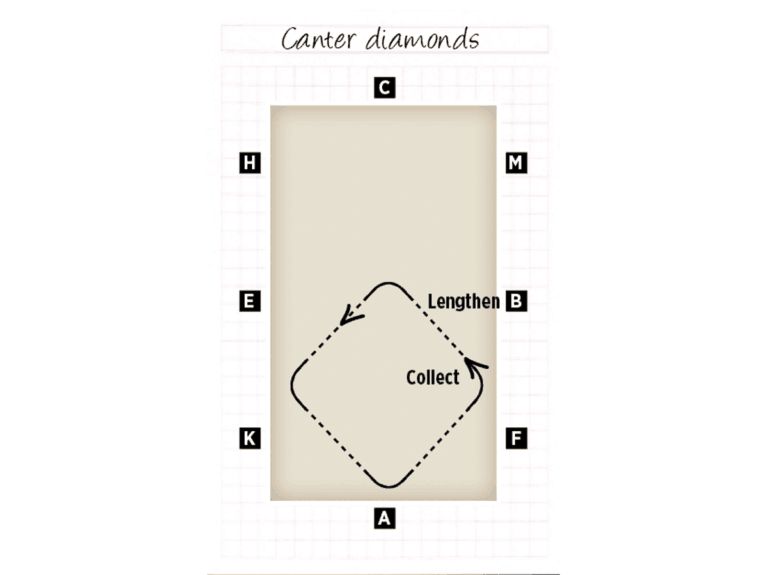
Before you think about medium paces, you need to compress your horse. If you go from working to medium trot without compression, he will get longer and lower, and you won’t generate any suspension or lift. My canter diamond exercise helps him learn how to take weight behind and improve his medium paces.
How to ride it
1. Establish working canter at one end of the arena.
2. As you approach A, leave the track and ride straight towards the long side. Although you’re riding a square, you’re aiming to hit each tangent point of a 20-metre circle.
3. Keep his body straight, compress the canter and turn him through 90 degrees – this should take around six short, bouncy strides to complete.
4. Maintain your inside leg against his side to support
him and, as you leave the turn, ride forward into a bigger canter.
5. Repeat the collected corners at each tangent point of the 20-metre circle.
Dan’s top tips
- Think of allowing your hand 2mm forward as you leave the corner.
- The rhythm should stay the same but the strides will get bigger and longer.
- You can change his action by shifting his balance, getting him to take more weight onto his hindlegs and physically using his joints to bend and create lift off the floor.
- Focus on creating engagement and then releasing it forward in a controlled way. Sit tall in the saddle and hold the balance you have created using your seat.
Problem-solving
Breaking into trot? Don’t worry, just establish canter and try again. Make sure you think of riding forward into the compressed strides around the corner.
Struggling to recollect? Use a few strides of shoulder-in. Judges would prefer to see you ride a little shoulder-in to regain collection than see your horse fall out of balance.
Anna Ross – 10 minutes – leg-yield zigzag
This exercise is great for improving your horse’s balance and suppleness, while testing your ability to maintain your balance and co-ordinate your aids.
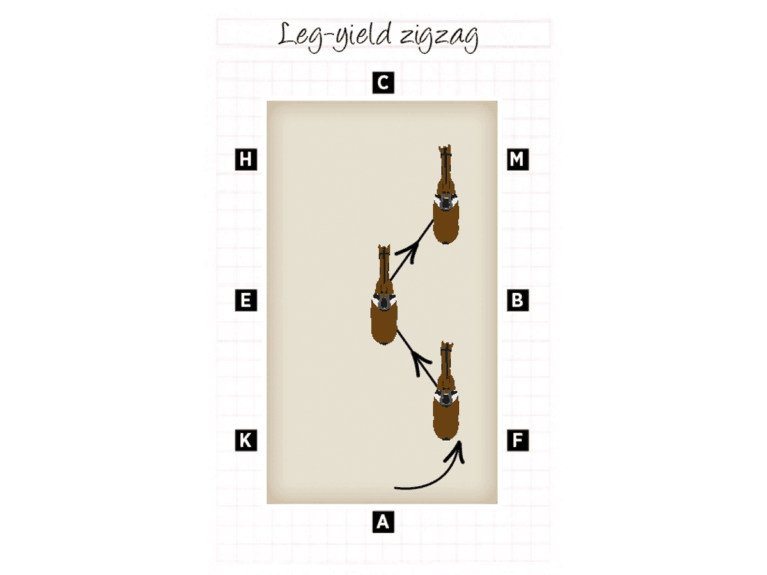
How to ride it
1. You can ride this in trot or canter, but begin in trot until you and your horse have got the hang of it.
2. The exercise begins as you leave the short side of the arena. Leg-yield from the corner marker towards X.
3. Once you reach X, change the bend and leg-yield to the next corner marker. Make sure to practise this on both sides of the arena and on both reins.
4. While leg-yielding, count out the rhythm so you stay focused, ‘One-two-three’ to X, ‘One-two-three’ to the next corner marker.
Anna’s top tip
In leg-yield, your horse is slightly flexed away from the direction of travel, and moves forward and sideways.
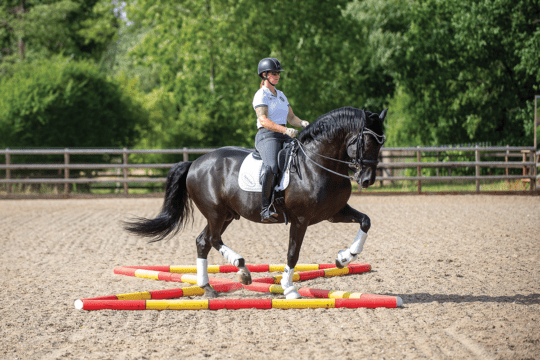
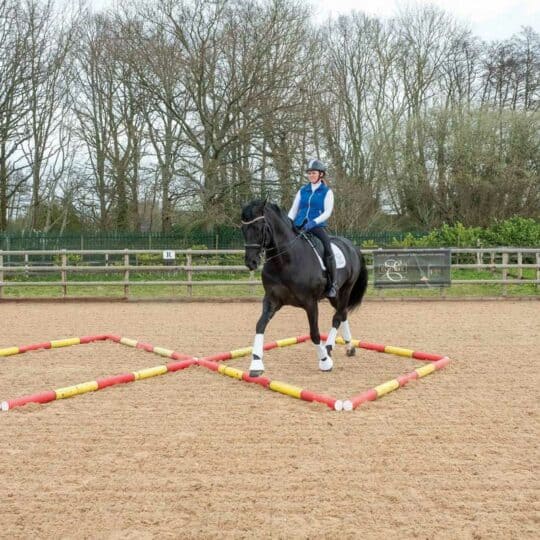
Tania Grantham – 10 minutes – clock face poles part 1
This exercise helps your horse to remain active and engaged in trot and canter, as well as testing your accuracy in positioning your horse over the poles.

Set it up
Position the poles at the four points of the clock face – midnight, three, six and nine o’clock. The outside of the poles should be two metres from the track if your arena is 20 metres wide.
Great for…
- Keeping engagement and activity while collecting the trot.
- Horses who struggle to maintain canter rhythm, because it emphasises the moment of suspension as he goes over the pole.
How to ride it
1. Begin in working trot on a 20-metre circle around the outside of the poles.
2. Spiral in so you trot over the outside third of the poles.
3. Keep gradually spiralling in and trot one full circle at each size – the next size is over the centre of the poles, then the inside third, then finally trot a small circle inside the poles (this will be around 10m).
4. Repeat the spiral in reverse.
5. Repeat in canter.
Problem-solving
Horse losing balance? Take sitting trot as the circles become smaller.
Breaking in canter? Use your inside leg along with half-halts to help him maintain balance. If the smallest circle is too hard for your horse to begin with, only spiral to the centre or inside third of the poles before moving back out. Repeat the exercise regularly and he’ll soon develop the strength he needs to do the exercise successfully.
Tania’s top tips
- If your arena is wider than 20 metres, mark the 20 metres line so you can assess the size of your circle correctly.
- The gradual spiral is important to give your horse a chance to balance at each level. Repeat on both reins.
Lucinda Fredericks – 15 minutes – raised canter poles
Raised canter poles produce and regulate your horse’s power, which gives you the chance to work on your co-ordination, timing and feel
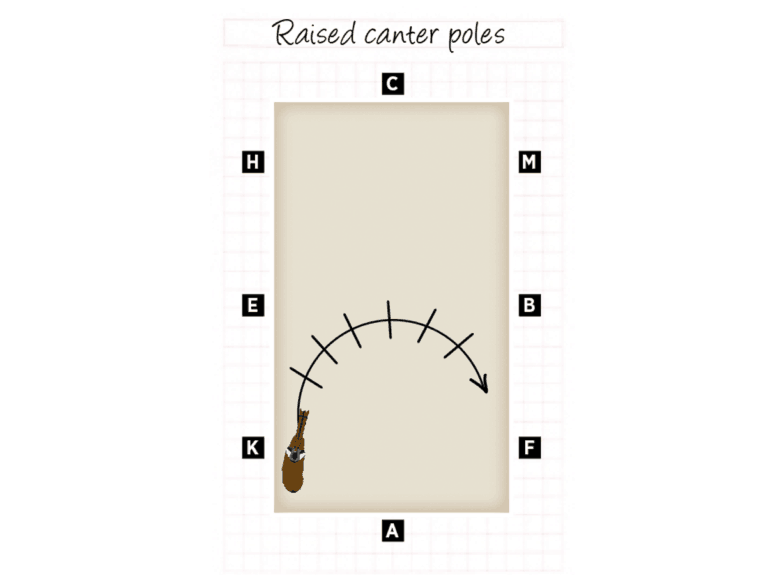
set it up
1. Set up a fan of poles on a curving line, not a
tight circle.
2. Stride out the distance between the poles on the outside of fan to three good-sized human strides. The distance between the poles on the inside of the fan should be two-and-a-half of your strides.
3. Raise the poles a few centimetres off the ground using small blocks or jump wings.
Great for…
- Building strength and flexibility in young horses
- Becoming more loose and elastic in your position
How to ride it
1. Warm up as usual, checking your horse is focused on your aids.
2. Establish canter, then spiral in and out on a circle. Ensure you have full control of your horse’s outside shoulder.
3. Before asking him to canter over the poles, adopt a light seat to allow him to move without your weight on his back.
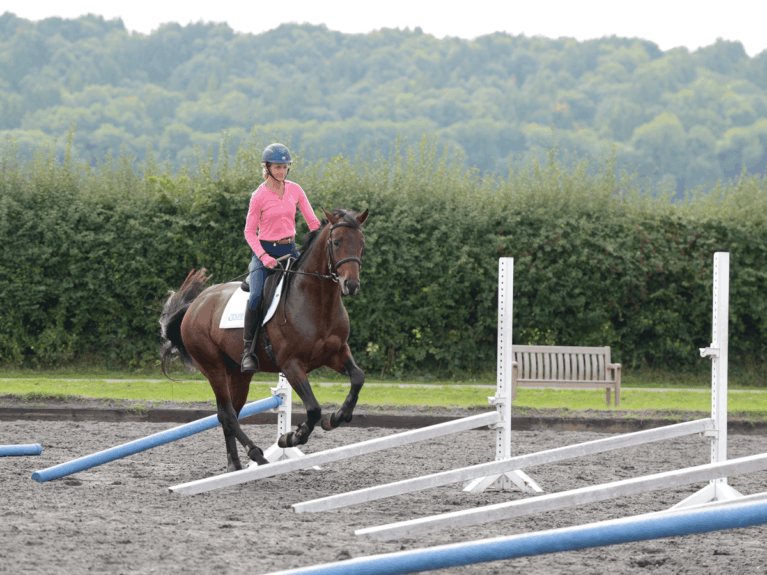
Take it to another level
As he becomes stronger, begin to use your weight in the saddle through the poles and ask him to lift up underneath you.
Once he’s mastered the poles, begin to ask for bend and flexion through the exercise – a little like lifting handweights while doing squats!
Lucinda’s top tips
- You’ll learn a lot from the way your horse responds to the raised canter poles. Does he drift to one side, fall in or out, or clip it with one hoof? These details can help you identify where he needs to build strength and give you something to focus on in your regular training.
- Raised poles ask your horse to exaggerate his hindleg action, bend his hocks and use his whole body through his abdominals to his back.
- Canter poles are physically demanding. If your horse is young or green, adopt a light seat. A few times on each rein through the raised poles is enough for one training session.
Your Comments
Related Articles

Newsletter Sign-up

Subscribe
Latest Issue
Brilliant Badminton
Added 22nd April, 2024
BRC secures SEIB sponsorship for further two years
Added 5th April, 2024
Tania Grantham’s diamond pole layout exercise
Added 27th October, 2022
Dressage to music – prelim level
Added 28th June, 2022