


Featured Professional

Fizz Marshall
Fizz specialising in exercised-based rehabilitation for horses with musculo-skeletal injuries.
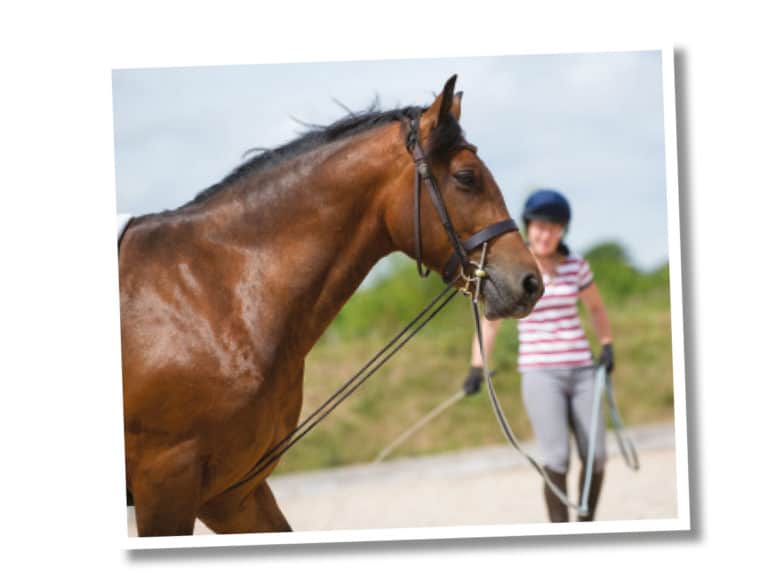
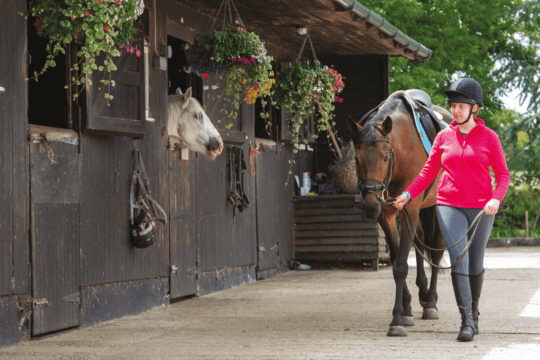
Lungeing is a great way to work your horse, particularly on winter nights when time is extra-precious. Fizz Marshall explains how to get started
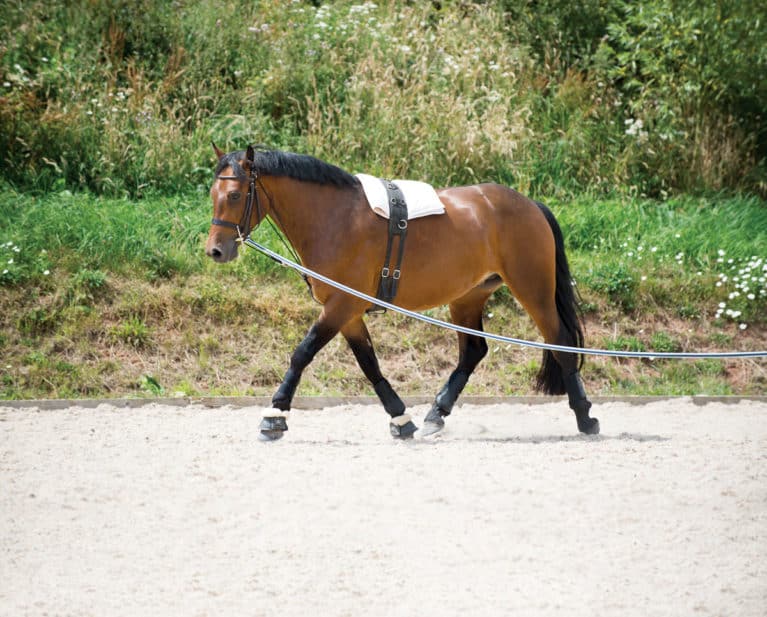
Lungeing is a great form of exercise for your horse. Plus, 20 minutes of good work on the lunge is the equivalent of an hour’s riding, so mastering this skill is a real asset, especially when time is at a premium.
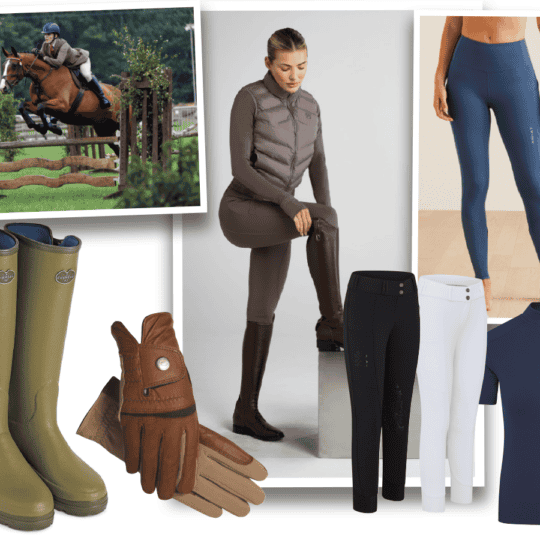
But before you begin to think about your lungeing skills, it’s important to get to grips with the kit your horse will wear, taking into account what you’re trying to achieve. If you’re starting from scratch, don’t panic – you can spend as much or as little as you want on equipment, but even the most basic kit can help you get good results. All you really need to get started are a lunge line and whip, although some kind of training aid will allow you to use the session to develop your horse’s way of going, rather than just stretch his legs.
Lungeing equipment
It can be easy to be swept up in what kit your fellow liveries or friends use on their horses. However, just as with selecting a bit, it’s important to think about your horse’s conformation and his way of going to help you decide what will work best for him. For example, if he’s inclined to be on the forehand, he won’t benefit from a training aid that promotes a long, low head carriage – such as a chambon – because it will only reinforce his tendency to shift his weight onto his front end. On the other hand, if he’s reluctant to stretch, this can be helped by an aid that encourages him to relax his frame and take the contact down and forwards – for example, a bungee.
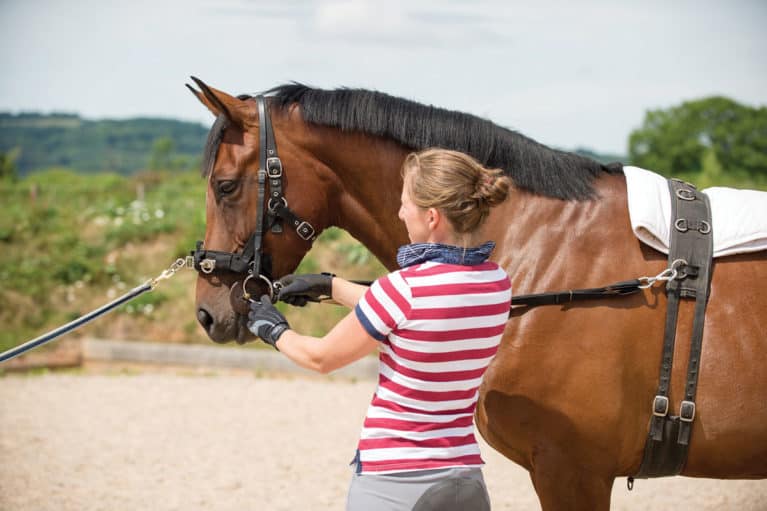
What to wear
While you can’t fall off when lungeing, you’re at close quarters to a horse who’s moving, potentially at some speed. Therefore, standard safety equipment is important – a riding hat (fastened), gloves and sturdy boots are a must. Rope burn is a common side effect of lungeing without gloves and is very painful.
Day to day
Just as you have different goals for each of your schooling sessions, you’ll have different plans for what you want to achieve on the lunge. Even if your horse works well in a pessoa, if your aim is to give him some gentle, unrestricted exercise due to lack of turnout, he may be better off in a cavesson with no other aids or influence at all. Think about what you want to achieve from each lungeing session and you’ll find they’re much more productive.
The essentials
- Cavesson or bridle
- Lunge line
- Whip
Cavesson or bridle?
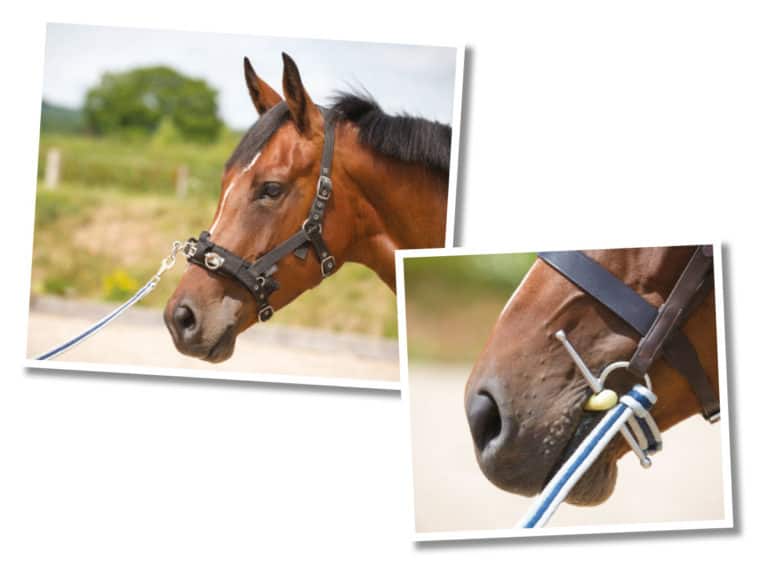
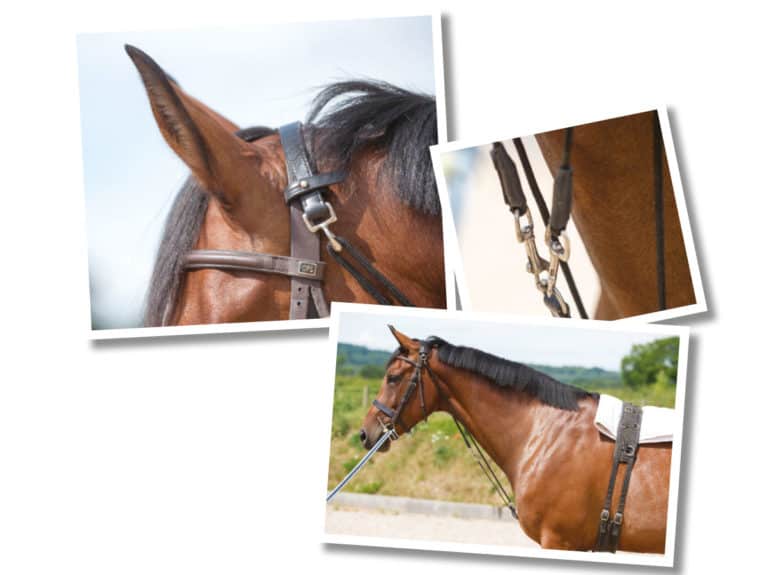
A lunge cavesson provides a bitless method of control and it has a hinged attachment on the front of the noseband for the lunge line to clip to. This means you don’t have to unclip and reattach the lunge line when changing the rein. When fitting a cavesson, remember that…
- sizing is important – it should fit his head snugly to prevent it from moving around his nose when you exert pressure on the line.
- there should be room for one finger between his face and the cavesson, and no more
- the noseband should be a thumb’s width below the bottom of the projecting cheekbone
- the strap that runs under his jaw keeps the cavesson stable on his face and should have room for one finger
Lungeing from a bridle offers a more direct contact and attaching the line directly to the bit gives you greater control. It’s also a good way to help generate lateral neck bend. However, not all horses suit having a training aid and lunge line attached to the bit because it can give conflicting messages. Try both set-ups to see what works best for you and your horse.
Top tip – If you want to fit a bridle over a cavesson, a sliphead (a bit attached to a headpiece) is ideal. If you don’t have a ready-made one, just remove the noseband, reins and browband from your flatwork bridle.
Lunge line
There are many different types of lunge line available, so try to find a tack shop with a few to choose from. Just like reins, the type you choose is very personal – consider the thickness of the line (which affects the bulk in your hand), the material it’s made from (which affects how easy it is to hold and how easy it is to slide through your hand) and its overall length (they’re not all the same). Look for a swivel clip at the end to avoid your lunge line becoming very twisted as you work.
Checking in
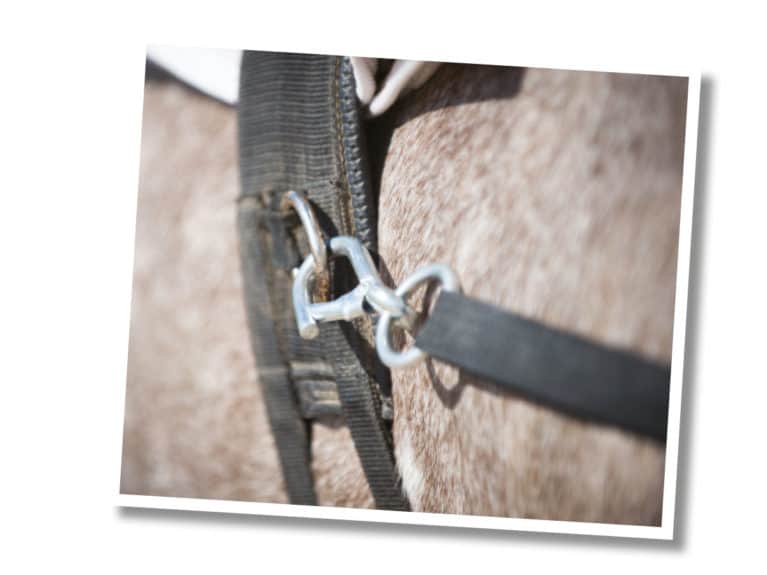
An overhead check is a way of attaching the lunge line over the top of your horse’s head by running it through the inside bit ring, up the side of his head and across his poll, and clipping it to the outside bit ring (facing outwards so it doesn’t rub his cheek). It’s a good method for horses who don’t like the feeling of the line under their chin or for fresh horses who can be strong on the lunge.
Whip
Your lunge whip needs to be long enough to be effective, but also well weighted so it’s easy for you to carry. Test out the feel of a few before you buy to ensure you’re comfortable moving the whip around. A bright colour is a good idea if you’re prone to putting the whip down in the arena and losing it.
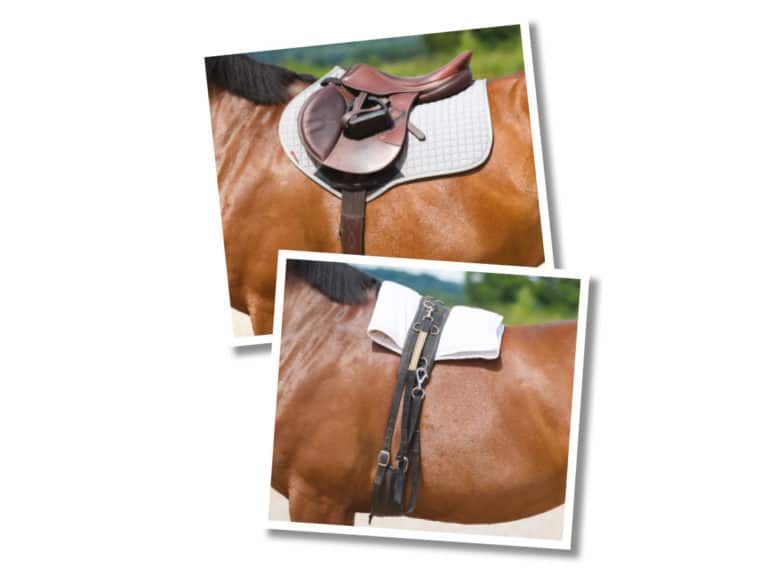
Saddle vs roller
- If you plan to lunge your horse in his saddle, secure the stirrups to avoid them banging against his sides, which may unsettle him as well as being uncomfortable. Run your stirrups up as normal, then feed the loops of the leathers back through the irons, securing them by threading the ends of the leathers through the loop
and pushing them through the keepers on the saddle. - Choose a roller with a minimum of three rings on each side, as well as at least one each on the spine and in the centre of the girth. This will give you as many attachment options as possible. Make sure the rings are a good size to allow clips and lines to pass through them easily.
- Rollers have a smaller surface area in contact with your horse’s back, so the pressure per square centimetre is greater. This means it’s important to use a specific roller pad or thick numnah to distribute the pressure.
Horse safety kit
Whether your horse is used to being lunged or a relative novice, it’s important to fit protective legwear. Brushing boots on all legs will prevent injury from knocks, which are more likely while he’s constantly turning on a circle. Consider overreach boots even if he doesn’t usually wear them, especially if he’s prone to being unbalanced, as the constant curve of the circle brings his inside hind into closer proximity to his inside fore, making an overreach more likely.
Which training aid is right for you?
Side reins explained
Side reins have many uses, depending on their position. They tend to encourage your horse to take the contact forward. Look for a set with some elastication to provide him with a little give in the feel he gets from the rein, as he would get from your hand if you were riding.
- fit the side reins to the roller or saddle and check the length by holding them to the bit (to begin with his nose should be just in front of the vertical when the side reins are attached), then fasten them either to the top ring of the roller or the D-rings of the saddle until he’s warmed up and ready to work
- your horse’s face should be vertical when the side reins are under normal tension (not straining or baggy)
- warm up with them on a looser setting (keep this loose contact if your horse has a very light mouth or a tendency to drop behind the vertical, as it will encourage him to seek the contact forward)
- don’t always fit the side reins in the same position. Altering their height during a session, as well as from session to session, allows you to change your horse’s frame and, therefore, his way of going. Experiment to see what happens when they’re lower or higher
- while it’s normal to have both reins the same length, fitting the inside rein slightly shorter than the outside can be a good way to encourage neck bend in a horse who finds this difficult
Top tip – Add a clip to the end of the side rein you attach to the roller (these are available from most equestrian retailers). Having a clip at both ends makes changing the height of the side reins, and removing them altogether, much easier and quicker.
Chambons explained
Chambons mainly rely on poll pressure, but also work on your horse’s mouth. The headpiece sits over the top of the bridle and attaches via two small straps that prevent it from slipping during exercise.
- don’t run the cords from the headpiece through the bit until your horse is warmed up and ready to work. When you’re ready to attach the chambon, thread the clips down through the bit rings and back to his chest, so they form a triangle under his throat
- the chambon should be fitted to allow the front of your horse’s head to sit vertically
How it works – A horse who works well in a chambon effectively draws his ears forwards away from his withers, lengthening over his neck and topline.
Top tip – Before investing in any kit, speak to your instructor to help you decide what might work best for your horse. Then try to borrow the training aid from a friend to check it works before you buy.
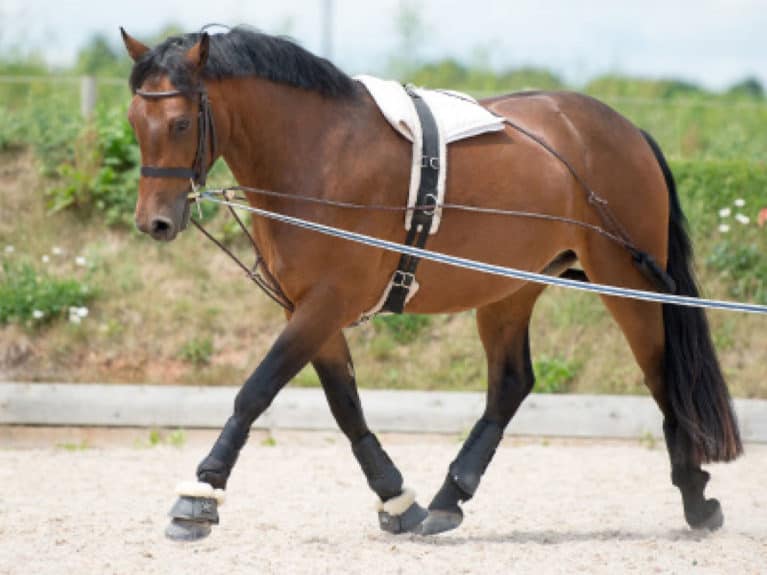
Pessoas explained
The pessoa works as a combination system, connecting your horse’s forehand to his hindquarters. Using a system of ropes and pulleys, the back strap runs around his quarters, between his hock
and stifle.
- when attaching the front ropes, adjust the length so your horse’s face sits comfortably at the vertical, not behind it
- the back strap needs to be loose enough to allow your horse’s hindlegs to move through the full range of movement, but not so loose that it drops onto his hock as his leg comes under his body. Adjusting this is a case of trial and error, as you’ll need to watch your horse move to assess whether you have the length correct
- don’t fasten the clips to his bit before he’s warmed up and ready to work, but do fit the back strap when you tack up, otherwise it’s likely to slip off his quarters as he moves
- the front attachments offer low, medium and high settings. Which is right for your horse depends what you’re looking to achieve. To use the low setting, run the cords through a low ring on the roller and attach the end clips to the girth between his front legs. For a higher neck, run the ropes through the highest rings on the roller and back to the roller itself, or to the clip on the girth between his front legs
Bungees explained
A bungee is an elasticated cord that runs over the top of your horse’s head, through the bit and clips to the girth between his front legs.
- until he’s warmed up and ready to work, clip the ends to each other over the top of your horse’s neck, so they hang like reins
- the benefit of a bungee is that it stretches along its length. This is particularly useful when you want to encourage your horse to work with a long, low neck carriage, because it prevents him from raising his head too high. Aids that work in this way can be used as an alternative for horses who’ve mastered the knack of sitting above the contact when working in side reins
- always be careful when fitting equipment that exerts poll pressure. Begin on a very loose setting to allow your horse to become accustomed to the feeling of it, then adjust it to the appropriate length for correct work
How it works – Similar to a chambon, it works on your horse’s poll and mouth to encourage him to lengthen his topline.
Watch his quarters
The downside of any training aid that only attaches to your horse’s forehand is that it doesn’t harness his hindquarters, so it may not be the most suitable tool if he needs to be encouraged to engage his hindleg.
As your horse’s schooling progresses, you may find the training aid that suits him, and your goals, changes. Regularly reassess how he’s going and don’t be afraid to ask for some help from your instructor or a knowledgeable friend to ensure you’re getting the most out of the sessions.
Your Comments
Related Articles

Newsletter Sign-up

Subscribe
Latest Issue

Brilliant Badminton
Added 22nd April, 2024

BRC secures SEIB sponsorship for further two years
Added 5th April, 2024
Tania Grantham’s diamond pole layout exercise
Added 27th October, 2022
Dressage to music – prelim level
Added 28th June, 2022