-
Riding Schooling and Training
-
Health and Veterinary
-
Management
-
Mind Matters
-
Buying and Selling
-
Insurance Advice
FAQs
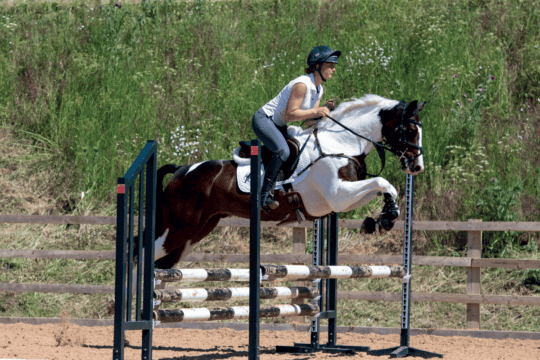
Ready to take your jump training to the next level? Jay Halim shares two simple exercises to test your horse over the poles
Straightness is one of the single qualities that can make the biggest impact on whether or not your horse jumps clear. And, if we’re being totally honest, it’s one of the easiest to neglect in favour of more exciting exercises when you’re working on your horse’s technique.
However, if you want to give yourself the best chance of leaving the poles safely nestled in their cups, it’s well worth the time it takes to get your horse’s body in order. Once you’re confident you’ve mastered this skill on the flat, take the challenge a step further by trying a new layout that’s as tough as it is rewarding.
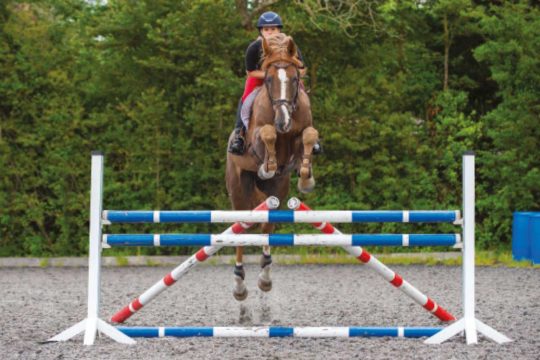
Make your turns count
Square turns are one of the simplest ways to boost the quality of your approach to a fence. Not only does it give your horse as much time as possible to digest what’s ahead of him, but it gives you the best opportunity to straighten up his body. But why is straightness so important? It’s simple – when your horse’s approach to a jump isn’t quite straight, he’ll push off more with one hindleg than the other. This is what commonly causes knocked poles, especially when the jump looks otherwise picture perfect – even the tiniest wobble can have a big impact.
Generally, if your head’s in the right place, your body and subsequently your horse’s body should follow. So, in order to square off your turns effectively, it helps if you have something to aim for. When you’re jumping or working over poles, it’s best to get your eye on the fence or poles you’re aiming for early, but if you’re just working on the flat, you’ll need to find a fence post or light to hone in on. Reinforce your aids by pulling your inside shoulder back, using your inside leg to bend your horse’s barrel around the turn while your outside aids support his body and stop him from falling out on the turn.
Make sure your turn has a clear beginning, middle and end. Once you’ve prepared your horse with your aids and started the turn, keep the movement itself brief by squaring off and positioning yourself on a straight line to the fence.
Use your warm-up wisely, practising square turns in the arena wherever you can – incorporate them into centre lines, squares instead of circles, or try squaring off a serpentine. Once you’ve mastered these turns you can move on to one of my favourite exercises. The best thing about it is that it can be easily adapted to fit into any rider’s regime, no matter their level.
TOP TIP
Mastered this exercise and want to increase the difficulty? Raise your poles by 30–60cm and transform this exercise into a short but sweet gymnastic challenge.
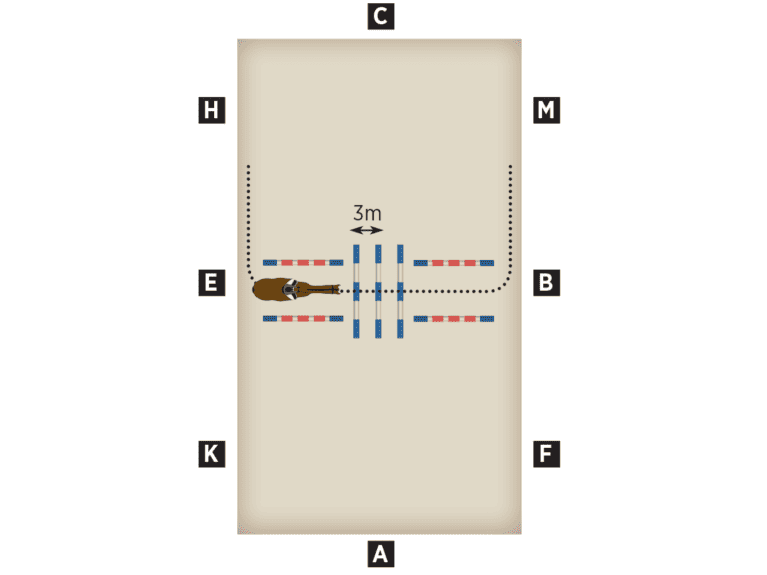
Take one – back to basics
Set it up
On the line between E and B, place a line of three or four poles spaced 3m apart, ensuring the middle of the layout lies over X. To start with, set up guide poles on your approach and getaway as visual markers to keep straight. The great thing about this setup is that you can ride over it in trot or canter.
Ride it out
- Using the square turns you’ve been practising in your warm-up, turn from E to B in trot.
- Once you’re on the line to the poles, focus on keeping your aids balanced – have a quick check from head to toe. Are your reins even? Are you encouraging your horse forward with both legs? Are you looking up?
- As you ride away from the poles, decide which way you want to turn and look in that direction. If you feel your horse start drifting one way or the other, ask him to halt, straighten him up, then turn the other way.
- When you’re confident that your horse is awaiting your instructions rather than making the decision himself, try in canter. Be quick to check his canter lead before you turn – you may need to transition back to trot to maintain the balance.
Reap the benefits
When it comes to jumping, you don’t want your horse to anticipate turns and land leaning one way or another. When he guesses, he only has a 50% chance of getting it right. But by tuning in to your aids, his odds improve dramatically. To get the most from this exercise, ask for a different outcome every time. You could make a direct transition to halt, turn left or right, make your turn before meeting the track or make an upward or downward transition, not to mention reversing the line and working from B to E. The only thing that needs to be consistent is your straightness on the approach and getaway.
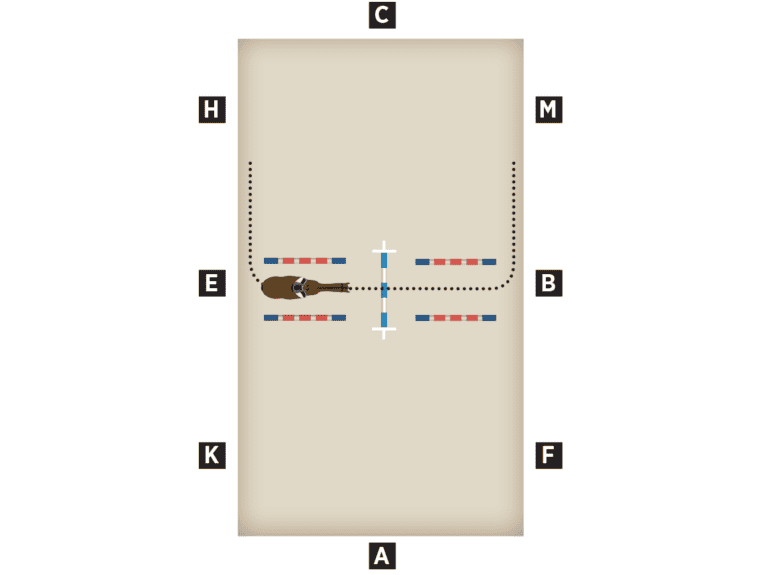
Take two – up a notch
Set it up
Place a single jump at X, on the line from E to B. Start with a height at which you and your horse are more than comfortable. Use guide poles to help you with straightness to start with, then take them away as you become more confident.
Ride it out
- Make a square turn across the arena from E to B, in trot to start with.
- Ride forward positively, again taking a moment to check that you’re channelling your horse forward evenly.
- On landing from the fence, you’ll need to make a quick decision about where to go next. Remember, every time you feel your horse anticipate a turn, you’ll need to remind him to wait for your instructions with a quick correction – whether that be a transition, change of direction or lead swap.
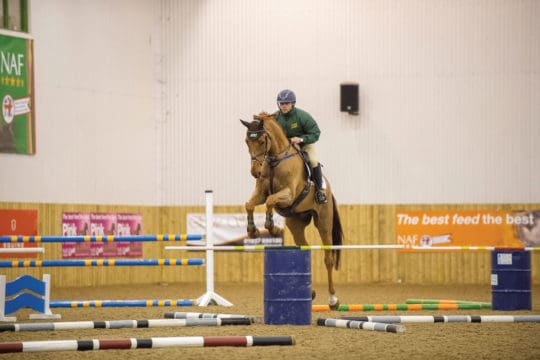
How it helps
While this might look like a straightforward continuation of the first exercise, the difficulty comes with the speed at which you’ll need to balance and rebalance your horse. The relatively short distance means there’s not a lot of time to set up before the jump or reorganise afterwards and, no matter how well rehearsed you might be over poles, jumping always adds an extra element of excitement.
Can’t keep straight? Add V-poles to the jump, starting with more of an inverted U-shape. This might be all the guidance your horse needs, but if he doesn’t straighten his body over the jump, gradually bring the poles closer together to create a point – he’ll have to stay straight through his body to clear it.
Your Comments
Newsletter Sign-up

Subscribe
Latest Issue
Brilliant Badminton
Added 22nd April, 2024
BRC secures SEIB sponsorship for further two years
Added 5th April, 2024