-
Riding Schooling and Training
-
Health and Veterinary
-
Management
-
Mind Matters
-
Buying and Selling
-
Insurance Advice
FAQs


Tackle ditches and angled fences with Nick Gauntlett
Posted in Riding Schooling and Training Jumping
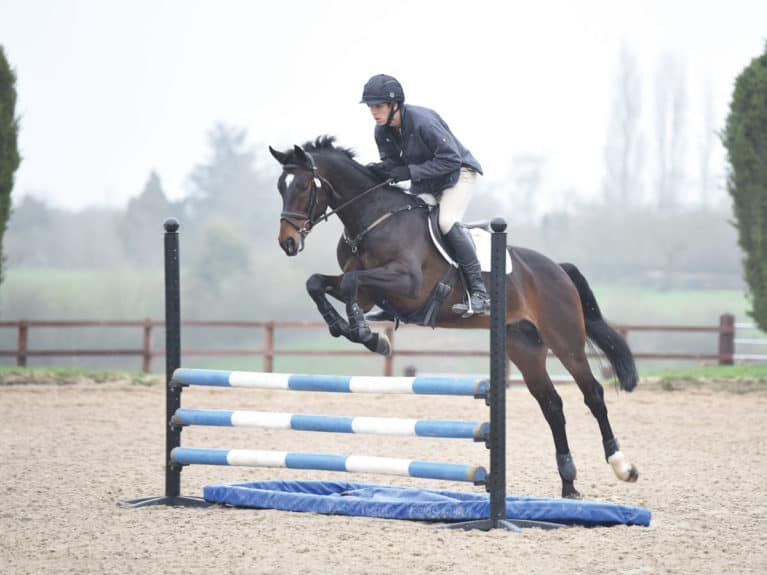
Ditches and angled fences are some of the most obvious rider-frighteners on every cross-country course, but you can make light work of them in the school with Nick Gauntlett’s top tips

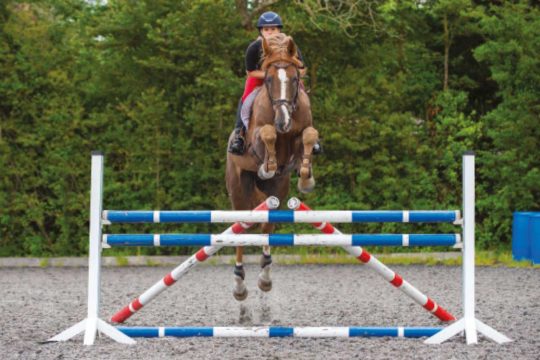
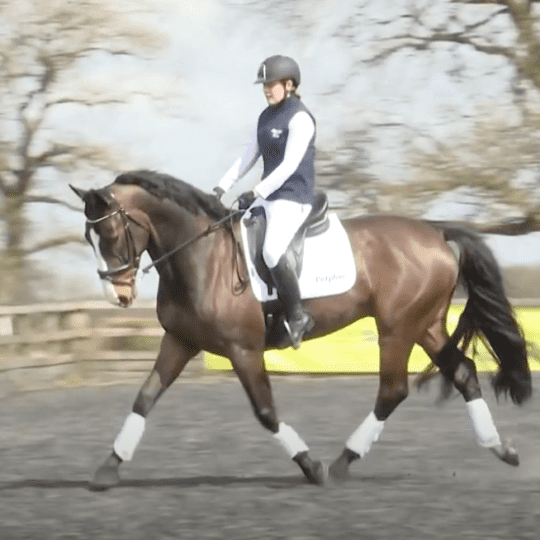
If you ask any eventer which type of fence they dread the most, nine out of 10 will give you an answer that involves a ditch. That might be a coffin, a trakehner, or even a palisade or ditch-and-hedge fence, but there’s no getting away from the fact that ditches are classic tests of a rider’s bravery and commitment, even though in many cases, such as in lower-level trakehners, your horse can’t even spot the hole in the ground. Fortunately, ditches are easy to recreate and practise in the school, and we’ll be doing just that this month – but first we’ll be using your skills over accuracy questions and your toolbox full of canter gears to string together some angled combinations.
It’s all in the angles
Angled fences appear on cross-country courses at every level, from inviting roll-tops or pheasant feeders on straightforward distances at the lower levels, to the tricky angled skinnies and brushes you see at four-star. Perfecting your approach and building your confidence over angled fences is easy when you build them in the school, as the angle can be adjusted incrementally as you and your horse become more comfortable. You can also afford to be braver, jumping more acute angles and really opening up your horse’s canter stride because, if anything goes wrong, the fence will simply fall down.
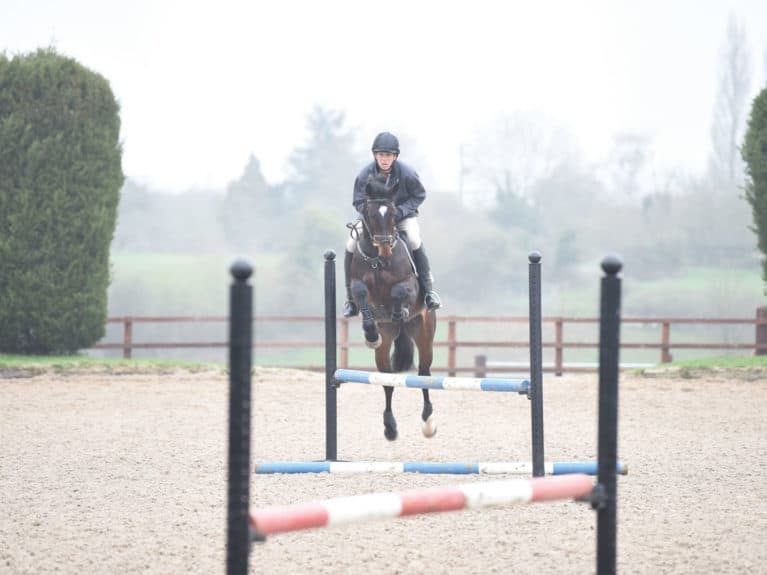
Set it up…
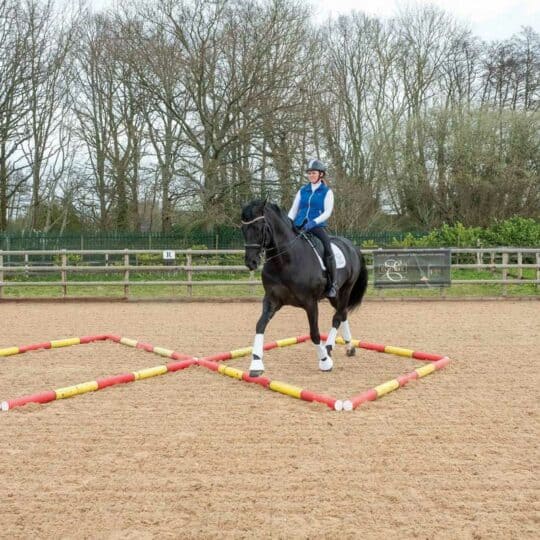
Build two simple upright fences on the centre line, set four strides (18m) apart. To start with, these fences shouldn’t be on an angle at all, so all you have to do the first time is jump through a straightforward line.
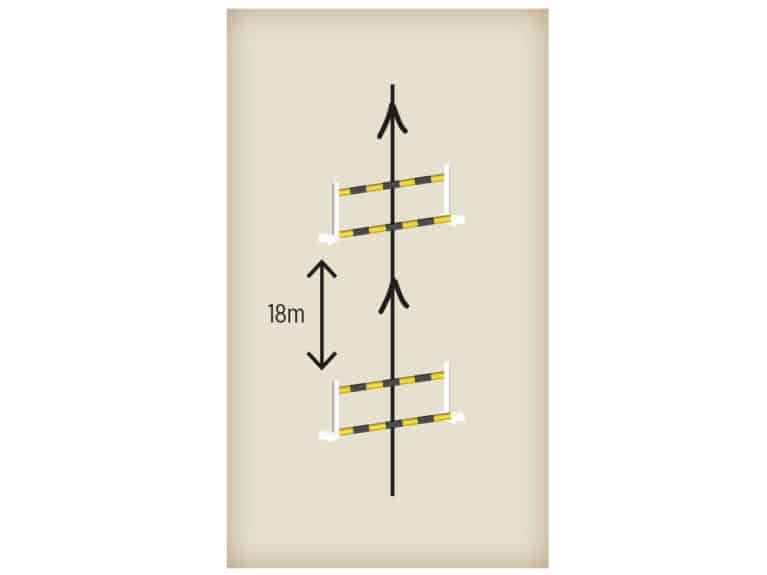
Once you’ve ridden through this once or twice, ask a friend on the ground to pivot both fences onto a shallow angle, with both angled in the same direction. The centre of each fence should stay in its initial position, so the distance down the middle remains set at 18m. You can start by leaving your ground poles straight, to give your horse and yourself an idea of how you should jump each fence, but once you’re comfortable, move the ground line onto the angle, too.
As you build confidence, increase the difficulty level by making the angles more acute. The point of the exercise is to teach you and your horse that you can jump a line of angled fences in exactly the same way as a normal line – you just have to know where you’re headed and commit to it.
TOP TIP
Invest in a set of flags for your showjumping wings. This helps to teach your horse that he should always try to pass between them – an idea that, once ingrained, can mean the difference between a clear round and an annoying 20 penalties.
TOP TIP
One of the benefits of working through technical questions in the school is that you’ve got plenty of options if something goes wrong. If your horse tries to run out at an angled fence, use a jump wing or a guide pole to funnel him in the right direction over the fence.
Switch it up
You can increase the technical difficulty of the question by angling the fences in different directions, or by keeping one straight and angling the other. Just ensure that you can always walk the correct distance down the middle – while perfect strides are never guaranteed on a cross-country course, it’s a different story in the school. Here, your aim should be to build confidence and sharpen your skill set, not set questions with no clear answer that trick your horse.
Considering the course walk
Angled fences ask a few different questions – can you commit to a line? Can you create sufficient power without sacrificing control? Are you able to interpret the combination and find the answer that’s easiest for your horse?
The last question is something you need to keep in mind when you’re walking a course. Sometimes, the direct line through a combination is best. But sometimes it makes more sense to jump through a line on a dogleg or square turn. The right answer depends on how the line relates to your horse’s stride pattern, the way the fences are set and how they are affected by the terrain. By practising plenty of answers at home, you’ll be prepared for any question at an event.
Dealing with ditches
It might seem impossible to school over ditch questions in the arena, but with a little creativity, they can be easily replicated and broken down into manageable steps. This is particularly useful if you’re working with an inexperienced horse, or if you tend to get hung up on the idea of jumping ditches or ditched fences, such as trakehners and some hedges and palisades.
You’ll need a water tray to simulate your ditch, but if you don’t have one, don’t worry – you can improvise. A filler can be laid on the ground to much the same effect, but make sure you use one without legs so that there’s nothing sticking up that could trip up your horse. Or, you can use a section of tarpaulin, secured with poles.
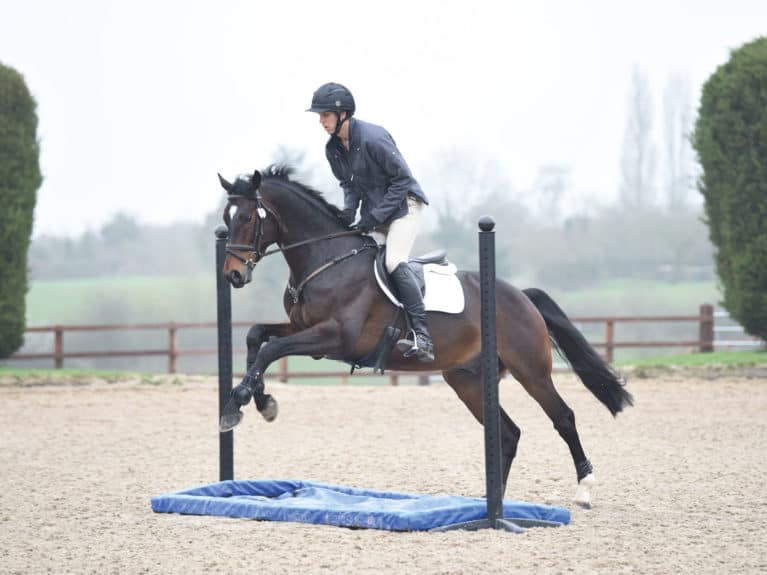
Stage one: introducing the ditch
Begin with the water tray, filler or tarpaulin on its own, with jump wings on either side to act as a visual aid and funnel your horse over the ‘ditch’. Tall, wide wings work best, rather than short wings or plastic blocks, and for safety’s sake you should always ensure that any jump cups have been removed before you approach the question.
Approach in a positive trot or canter, with your eyes up and your horse heading straight for the middle of the ditch. You should be sitting centrally in the saddle, not tipping forward in anticipation of the fence, and prepared to give with your hands, as many horses take big, long leaps over ditches or their simulations on the first attempt.
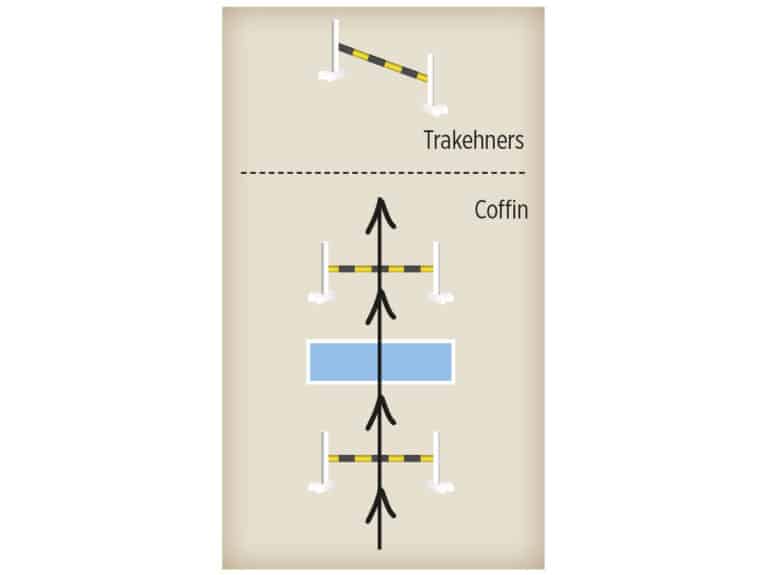
Stage two: creating a trakehner
Once you’ve popped over the ditch a couple of times on each rein, you can create a small trakehner by placing a pole over the ditch. This doesn’t have to be high – my Novice horses will pop over a 90cm or 1m rail, but you can set it at 70 or 80cm and benefit just as much.
Trakehners are one of the most commonly loathed fences by many riders, but they don’t actually need to be ridden any differently than a hanging log, as the ditch falls well within your horse’s natural take-off and landing points. It’s important to keep your eyes up and focused ahead as you approach the fence in a forward-going canter – if you don’t look down at the ditch, your horse has no reason to, either.
Stage three: preparing for palisades
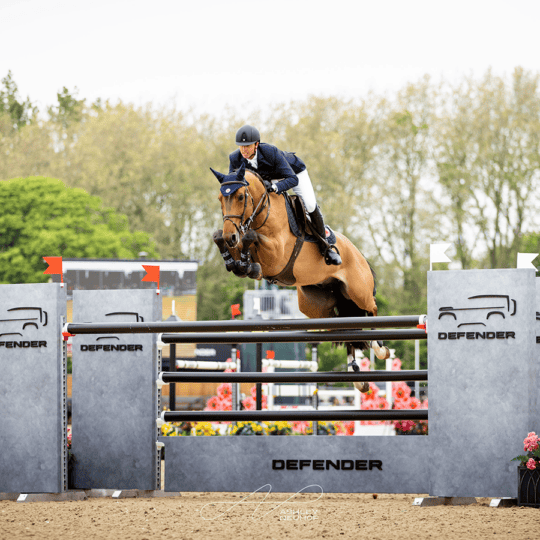
The final step is to create an imitation palisade fence, which is a gently sloping, solid upright fence with a ditch on the take-off side. These fences tend to ride well if tackled properly, as the edge of the ditch creates a distinct and straightforward ground line, but it’s essential to create the right canter, with plenty of power and energy to give your horse the chance to sail over it.
Build a small upright of 90cm or less, using three poles to make it less airy and more visually substantial than before. Position your ditch on the take-off side, so that the far end of it is level with the poles. Approach in a big, open canter and don’t fixate on your take-off point – fences with sloping profiles give your horse the chance to take responsibility for his own jumping effort.
Want a challenge?
Combine your skills over angled lines with your new-found confidence over ditch fences. Although you’d never approach a palisade on an angle, you’ll sometimes find angled trakehners even on low-level courses. In these, the pole or log sits diagonally across the ditch, but it’s the ditch that determines your line and angle of take-off.
You can also create lines using your artificial ditch to replicate coffins. Build an upright a couple of strides before your ditch, and another a couple of strides after, to simulate this common question.
Horses for courses
I advocate a positive canter in almost everything you do over cross-country fences, whether real or simulated, but this can seem a bit tricky if you have a very hot or a very lazy horse. In both cases, it’s important that your horse’s mind is on the job, and he’s directing – or generating – his energy productively.
Feeling hot
While I’ll tackle an oxer in a very open stride normally, I’d be careful not to set a hot horse alight on the approach, particularly if there’s a combination afterwards. It’s important to know the difference between fast and forward – I liken it to riding a bike down a steep hill. If you took your feet off the pedals and flew down it, you’d go incredibly fast, but would have no power to get up the other side. On the other hand, pedalling might seem like overkill as you’re zooming down, but by continuing to use your legs, you’ll create enough power and momentum to make light work of the upward trajectory on the other side. Your legs are just as important when you’re riding a hot horse as they are on a lazy one. Even if your horse feels as though he’s running away with you a bit, your leg needs to be on and talking to him. That communication can be a whisper, but you need to make sure it’s there and influencing him. Often, a hot horse will stop at a fence because his rider daren’t move – this gives him no direction or confidence, and unless he’s a real saint, there’s no reason for him to give you a joyride around the course and drop you off at the lorry.
Rev it up
If your horse is a lazy type, the answer is still more leg. A horse who’s behind your leg is like an old Land Rover being driven around in too high a gear – you want him to feel like a Ferrari, purring along in the right gear. You need to be able to press the accelerator and feel an instant increase in revs. If your horse takes a few strides to respond, that’s not a horse you can safely ride at solid fences. I like to ride lots of collected to medium canter transitions to warm this type of horse up – just backwards and forwards until the transition is instant and you can feel that your horse stays engaged. Then, if he backs off from a fence, you can add some leg and he’ll respond by opening his stride and powering forward.
Building for success
Time spent practising your cross-country skills in the arena gives you a much better chance of succeeding when you eventually get out on course. Not only will you instil your horse, and yourself, with confidence and cement your trust in each other, but you can develop your technical knowledge in a safe, familiar environment with fences that are far more forgiving than the solid alternative. Try to make it a regular part of your training, particularly during the winter when you’re preparing for the new eventing season.
With thanks to Ariat for their help with this feature, ariat.com
Your Comments
Newsletter Sign-up

Subscribe
Latest Issue
Horses, Hounds and Heroes
Added 2nd May, 2024
Spectacular international entries for Royal Windsor Horse Show 2024
Added 2nd May, 2024
Tania Grantham’s diamond pole layout exercise
Added 27th October, 2022
Dressage to music – prelim level
Added 28th June, 2022