-
Riding Schooling and Training
-
Health and Veterinary
-
Management
-
Mind Matters
-
Buying and Selling
-
Insurance Advice
FAQs


Stuck for ideas when schooling on winter evenings? Horse&Rider comes to the rescue with four fun, quick exercises from top trainers to improve your horse’s way of going and your riding, too

The Horse&Rider team knows only too well how demotivating the long, dark nights can be, but there are plenty of fun ways to make the time fly by and improve your horse’s way of going at the same time. Here are four new ways to challenge yourself and your horse.
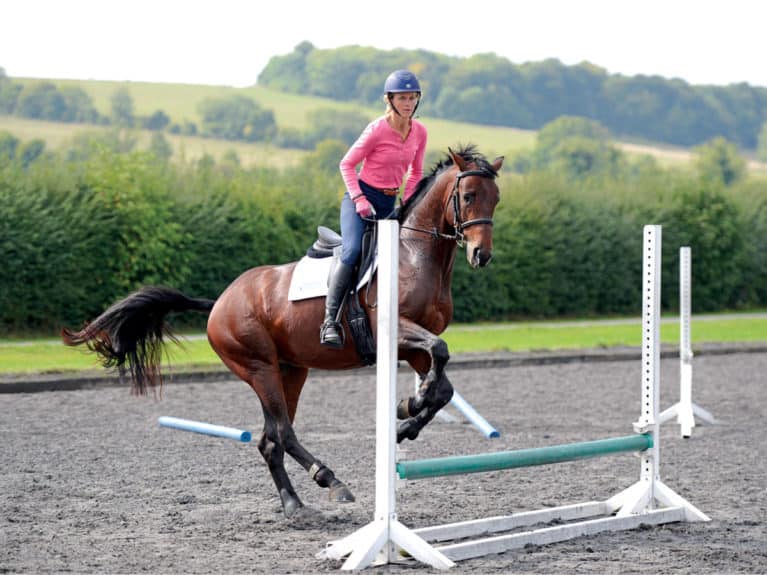
Lucinda Fredericks – 5 minutes – tiny jump on a circle
This exercise is great for teaching your horse to focus on what’s in front of him. The height of the fence is immaterial, so keep it really small and enjoy playing over it.
How to ride it
- Establish canter on a circle, then gradually move the circle so that the small jump is on it.
- Don’t adjust the canter or alter your way of riding because of the fence – keep everything exactly the same.
- Focus on regulating the rhythm and quality of your horse’s canter.
Great for…
- Youngsters
- Horses who get excited, rush or overjump
Lucinda’s top tip
Practise this exercise every few days until your horse finds it quite boring – this will help him settle when you’re jumping for real.
When he’s round through his neck and back, travelling forward and taking punchy, active steps with his hindlegs, the jump becomes just a little bump within the same canter rhythm.
Anna Ross – 5 minutes – careful aids
Learning to use your legs sparingly rather than applying a leg aid each stride will help you to create a more responsive horse. This exercise helps your horse to tune in and get in front of your leg, as well as teaching you to be more disciplined in your approach to training.
How to ride it
- Begin in halt. Adjust your position in the saddle so your lower leg is not in contact with your horse’s sides.
- Ask for an upward transition by applying a single leg aid. To do this, move your leg towards your horse’s side, then immediately take it away again.
- If he doesn’t respond, repeat the leg aid along with a tap of the whip just behind your leg. This is better for your horse in the long-term, as the whip helps him to learn what you mean with one simple, gentle leg aid.
- Be really disciplined about the position of your leg away from his sides and your horse will soon tune in to the slightest movement of your leg.
Anna’s top tips
Horses who are sharp or excitable need a bit of support and encouragement from your leg to face the world, while horses who are a bit more relaxed can be trained to be sensitive and forward from very tiny leg aids.
This isn’t a suitable way to ride all the time – the idea is that this exercise will teach you to be thoughtful about using your leg aid. Once you’ve unlearned the habit of nagging your horse, you can resume your normal riding position – minus the annoying legs!
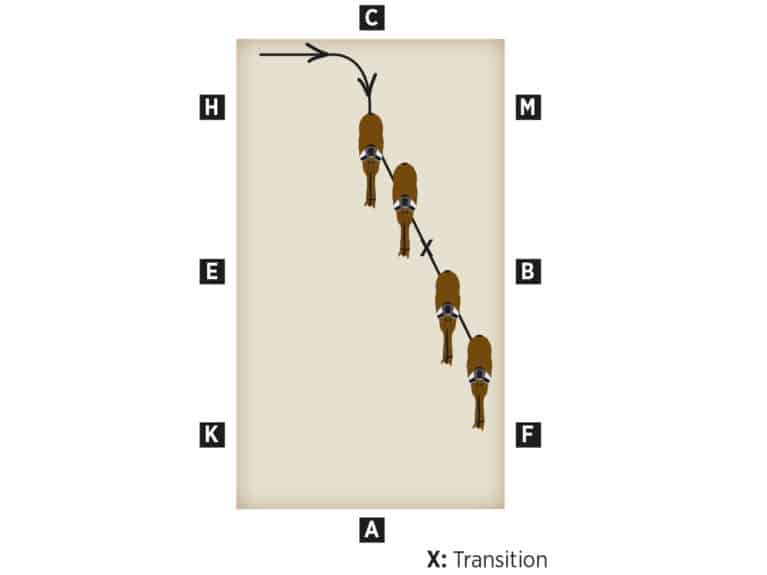
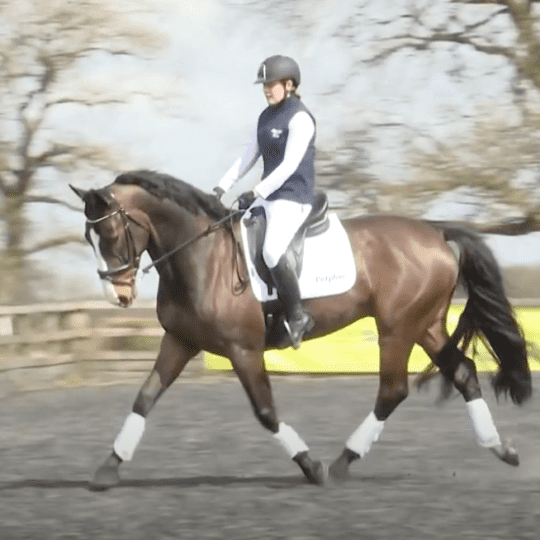
Dan Greenwood – 5 minutes – leg-yield transitions
Ensuring your horse is in front of your leg is the foundation of dressage and essential for engaging his hindquarters. My leg-yield exercise helps to teach him what you want him to do.
How to ride it
- Begin in walk to give yourself time to think. Analyse your horse’s reaction to your leg. If he doesn’t react, put your leg on and leave it on until he moves away from it. The reward is to take your leg off.
- Come around the corner and check you have continual bend through his body. Think ‘bend the horse in his body, not his neck’.
- Ensure you have a bit of flexion. Keep your outside rein straight, hands level and turn your body with your horse’s shoulders. So, if you’re leg-yielding left, then keep your shoulders slightly right. Keep your right leg down, your balance back and down onto your right leg, and your horse bent slightly around it, then start moving him over using your leg in time with his stride.
- Take sitting trot for a few steps while continuing with the leg-yield. Feel that you have made a connection from your inside leg to your outside hand, then put your inside leg on to ask for canter.
Great for…
- Getting him in front of your leg
- Establishing control through the outside rein
Problem-solving
Losing control of his shoulder? Ride straight up the three-quarter line, then add a little leg-yield. If you feel you’re losing his shoulder, ride straight again. Keep checking that you have control.
Losing impulsion? Keep thinking forward through the turn, slowing down makes it harder, not easier.
Dan’s top tips
Often when a horse feels lazy, he’s blocking in his body and this exercise eliminates that blocking because you have already got him supple around your inside leg.
Keep riding forward. You can begin this exercise in walk or trot.
The first stride of trot or canter works to bring his outside hindleg under his body, engaging his quarters.
Focus on his reaction to your leg. Don’t worry about the contact because that will come.
Stopping the leg-yield is as important as starting it. Check you have control through your outside rein, rather than your outside leg, by riding a little leg-yield, then going straight.
Take it to the next level
Switch the upwards transition for a downwards one instead.
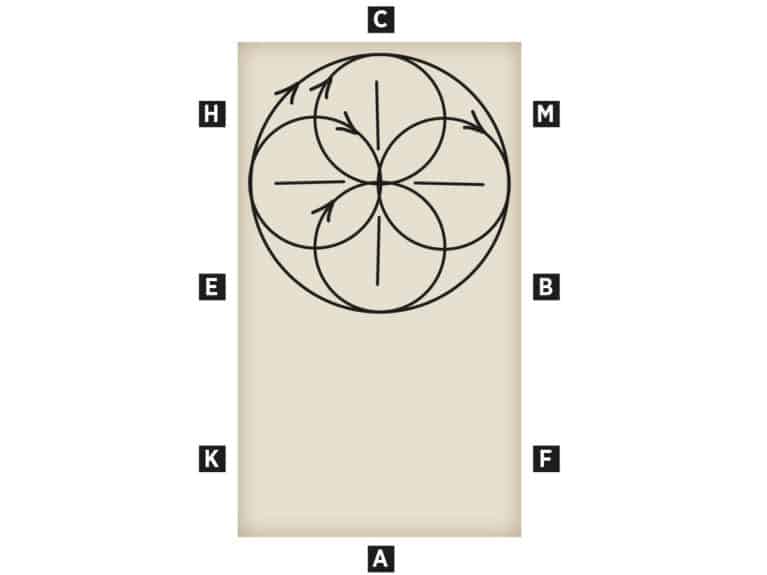
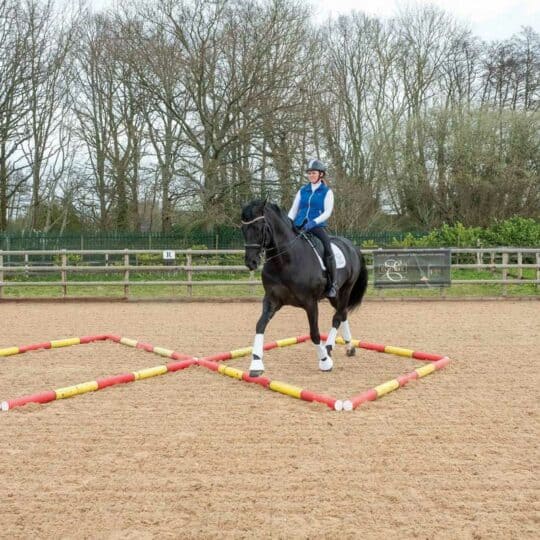
Tania Grantham – 10 minutes – clock face poles, part 2
The second phase of my clock face poles exercise really tests your horse’s balance and helps improve rider accuracy, too
Set it up
Position the poles at the four points of the clock face – midnight, three, six and nine o’clock. The outside of the poles should be two metres from the track if your arena is 20 metres wide.
How to ride it
- Start in trot on a 20-metre circle around the outside of the poles.
- Ride a 10-metre circle inwards around one of the poles, then continue on the 20-metre circle. Repeat this around each pole so you ride a series of inwards 10-metre circles.
- To change the rein, ride two half 10-metre circles. The first half circle goes around one pole (say three o’clock) then you straighten (which should be exactly on the centre line, lined up with midnight and six o’clock). Change the bend and then ride the other half 10-metre circle around the nine o’clock pole.
Great for…
- Rider accuracy
- Horse balance
- Developing simple changes
Problem-solving
Struggling to ride the 10-metre circles? You probably need to slow down. Try riding in sitting trot or think of slowing the canter while keeping it jumping.
Take it to the next level
The same exercise can be done in canter. To change the rein, ride two half 10-metre circles, but ride a simple change (canter-walk-canter) on the centre line.
Include medium canter. Ride medium canter for a whole circle, then use an inwards 10-metre circle around the pole where you started medium canter to help you collect again.
Tania’s top tips
Remember to use your outside leg and rein to turn your horse.
Lighten your inside rein when your horse is turning and bending.
Check out part 1 of this winter training series for more exercises for you to try.
Your Comments
Newsletter Sign-up

Subscribe
Latest Issue
Horses, Hounds and Heroes
Added 2nd May, 2024
Spectacular international entries for Royal Windsor Horse Show 2024
Added 2nd May, 2024
Tania Grantham’s diamond pole layout exercise
Added 27th October, 2022
Dressage to music – prelim level
Added 28th June, 2022